
Hail, adventurer! Are you preparing to win (or at least do reasonably well at) your upcoming Final Fantasy draft event? That’s great, as our Draft Guide can help you with that. At the end of the article, you should have a good idea of what’s going on in the format.
If you’ve read our other draft guides, you already know what to expect. If not, here’s a quick overview. First, we’ll explore the main Mechanics of the format, then continue with Best Commons. A deep dive into the Archetypes follows, as well as some Additional Tips. Finally, we wrap things up with a Draft Tier List, with every card in FF Play boosters graded.
So, what are we waiting for? Lets get to it and explore this fun draft format.
UPDATE: On June 20th, after two weeks of drafting the set, this article got a massive update. The new information should be even more accurate and reflect the actual state of the format better.
Table of Contents
Final Fantasy Mechanics
There are only two mechanics with major impact on Final Fantasy drafts:
- Job select
- Saga creatures
To be fair, there are some others, but they don’t appear often and aren’t particularly impactful. For example, the Tiered mechanic is on only six cards, plus it’s just another take on modal cards of sorts. (Like Fire Magic.)
So, let’s instead focus on the main two mechanics instead.
Job Select
Job Select is a trigger ability than can appear on Equipment. When an Equipment with Job Select enters, you create a 1/1 colorless Hero creature token and attach that Equipment to it.

Let’s say you play Warrior’s Sword. You create a 1/1 Hero, and attach the Sword to it, making it a 4/3 Warrior. Then, it functions just like any other Equipment would. You can pay its equip cost (5 mana) to equip it to another creature.
You shouldn’t treat these as regular Equipment. Instead, consider them creatures that leave behind an Equipment.
As you’ll discover in the Archetypes section, these synergize well with multiple decks. They are artifacts (blue-white), Equipment (red-white), creatures that count as noncreature spells (blue-red). They also provide two permanents that you can sacrifice (black-white).
There are 12 non-rare Equipment with Job Select across all five colors. Naturally, their strength depends on a card-to-card basis, but in general they are fairly useful. Even if you don’t use specific synergies, they give you something to do with your mana in the late game.
Saga Creatures
Sage creatures are exactly that: a saga and a creature on a same card. When it’s in play, it mostly acts like a creature, it has power and toughness, and it can attack and block. Furthermore, when it enters and after your draw step, you add a lore counter to it, and the appropriate chapter (equal to the number of lore counters) triggers.
After the last chapter triggers, you need to sacrifice the card. This might seem a bit convoluted, if you’ve never played with sagas before, so let’s take a look at an example.

You pay five mana and cast Summon: Fat Chocobo. It comes into play as a 4/4, and you add a lore counter to it. First chapter triggers right away, so you create a 2/2 Bird token.
Next turn, after you draw your card for the turn, you put another lore counter on the card. Now it has two lore counters, so the second chapter triggers. Your creatures get trample. This process repeats twice during your next two turns. (Since the second, third and fourth chapters are the same.) Then you need to sacrifice the card.
In order to get the full value from your saga creatures, you’ll want to aggressively trade them for your opponents’ creatures. This way, you get around the downside of sacrificing the saga.
This opens up interesting decisions for both players. Do you want to keep the saga around, so you get the full value from its chapters? Or do you want to trade it quickly, so you don’t need to sacrifice it for nothing? As always, this will depend on the context, so there isn’t one answer that would cover all scenarios.
With that, we’ve covered the two main mechanic, so it’s time to check the best commons.
Best Commons for Final Fantasy Draft
Commons are the cards you see most often, and will represent a large proportion of your decks. Thus, it’s a good idea to know which are the best ones. As far as uncommons go, we’ll talk more about those in the Archetypes section.
White
1. White Auracite

These kind of effects usually cost three mana, but this one comes with an additional bonus of providing mana. Removing your opponent’s best thing while ramping is quite a powerful combination. (You can already use the mana on the turn your play Auracite.)
However, the double white in the mana cost isn’t trivial. You’d want white to be your main color by playing at least 10 white sources. Even so, this artifact is good enough that it warrants doing so.
2. White Mage’s Staff

This is an excellent cheap Equipment. Early, it’s a 2/2 that can gain you some life and just meaningfully participate in combat. In the mid to late game, the 3 mana to equip isn’t that much. Sometimes +1/+1 is enough to enable profitable attacks, and the incidental life gain is useful.
That’s simply a lot of value for a two mana card.
3. Magitek Infantry

Magitek Infantry is surprisingly useful for a one mana card. Sure, you don’t want to play it until you have at least three copies, but once you do, the fun starts.
Whenever you have three mana leftover, you can activate Magitek, to pull another from your deck. You don’t need to do so at sorcery speed, which means you can pass the turn, while holding an instant. Then you have the option to either use an instant or activate Magitek, whichever is more beneficial.
Once again, this is a card that ends up doing more than its mana value would suggest.
Honorable Mentions

Slash of Light benefits from Job Select cards, as each one provides two points of damage. At two mana and instant speed, it’s a respectable removal spell. Just make sure that you’re opponent can blow you out by removing one of your creatures in response.
You’re Not Alone is a nice pump spell. +2/+2 is often enough to win combat, and +4/+4 comes up often enough. Sometimes, you’ll just be able to finish the game with it.
Getting a couple of artifacts in play is surprisingly easy, at which point Gaelicat becomes a potent threat. On the other hand, if your deck didn’t end up with enough support, the cat should stay out of it.
Fate of the Sun-Cryst is a useful piece of removal, particularly if you’re playing a more defensive deck. (This means that you’ll more often be able to fire it off with cost reduction.)
Blue
1. Dragoon’s Wyvern

With Wyvern, you’re getting a relevant flyer (which is a great target for various equipment) plus a 1/1 token, which can be used for all sorts of things. A powerful common, which you’ll happily play as many as you can draft in all your blue decks.
2. Combat Tutorial

The classic draw two for three mana is Divination, which is usually playable, but sometimes falls a bit short. The additional +1/+1 counter might not seem like much, but it actually improves the card significantly.
Now you aren’t just drawing cards, but also at least somewhat affecting the board. (Unless you don’t control any creatures.)
On top of that, card advantage is very important in Final Fantasy draft, making Combat Tutorial into a desirable common.
3. Ice Magic
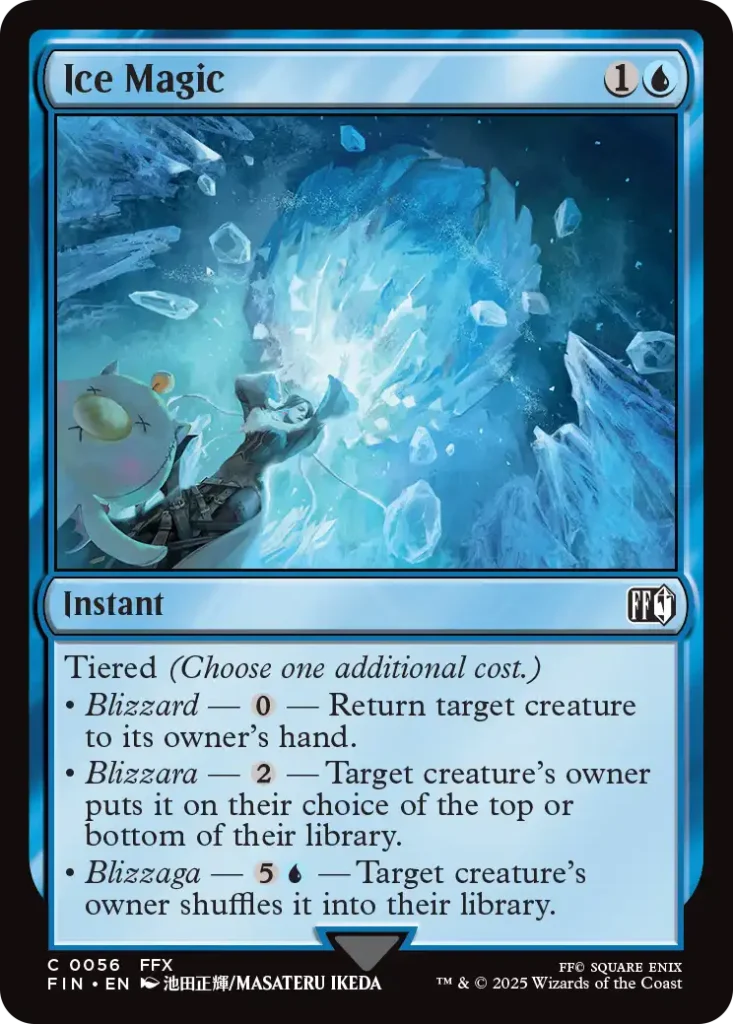
Four mana instants that put a creature on top or bottom of library, have been very solid commons in most recent draft formats. There’s an additional upside to Ice Magic, as you can cast it for only two mana to simply bounce a creature. This kind of versatility is really amazing, and allows you to really mess up with your opponent’s plans.
Occasionally, you’ll even be able to play eight mana in the late game, to shuffle a creature away. Most blue decks will actively want a couple of copies of this common.
Honorable Mentions
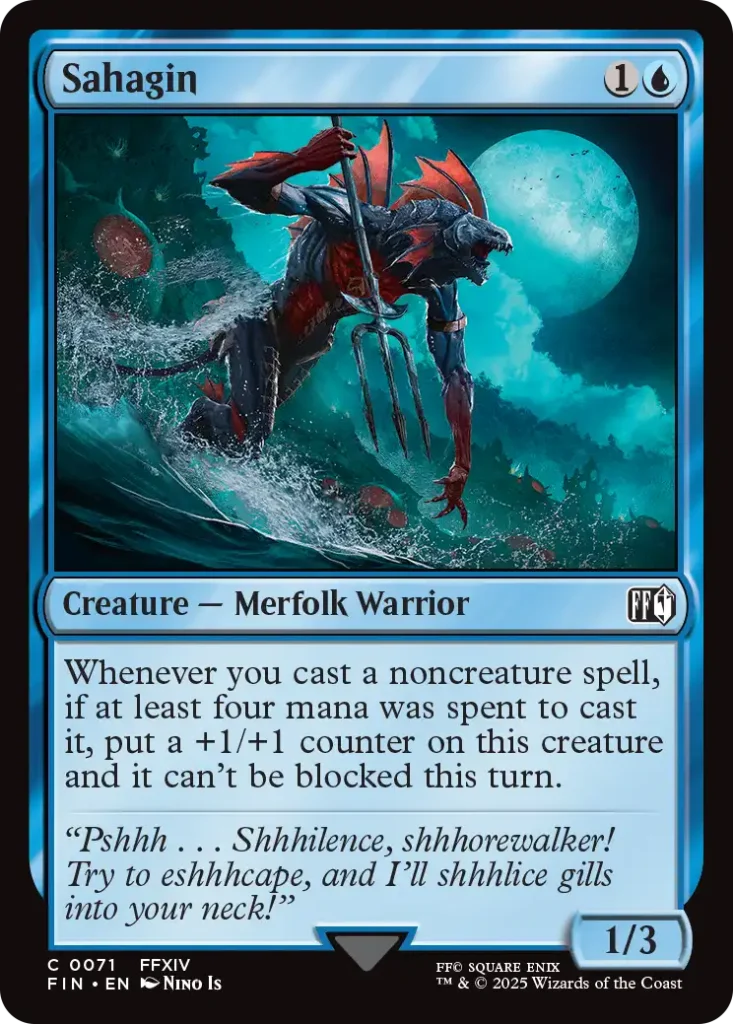
As you’ll see in the Archetypes section, blue-red’s theme are noncreature spells that cost at least four mana. As it turns out, that’s not hard to do, so cards like Sahagin ended up over-performing in pretty much all blue decks.
It’s not hard to trigger it, and even if you only manage to put a single +1/+1 counter on it, you already have an oversized two drop. Plus, it can eventually become a win condition.
Syncopate is a useful counterspell. It’s a card that can make up for being on the draw, when you counter their three mana play on turn three. Besides, it can also do its job in the late game by countering a powerful bomb.
Dreams of Laguna might seem clunky, but we’ve talked about how card advantage is good in this format. At the end of the day, this is a card advantage spell, that plays well with various blue instants. (Allowing you to hold up mana, then make the decision.)
Black
1. Sephiroth’s Intervention

In some formats, a four mana removal might be too clunky. However, that’s not the case in Final Fantasy drafts. Being an an instant, costing just a single black mana, and dealing with any creature is enough to make this into a really solid card. Plus the couple of life is often relevant.
If you draft a black deck without any Interventions, you’ll be kinda sad about it.
2. Vayne’s Treachery
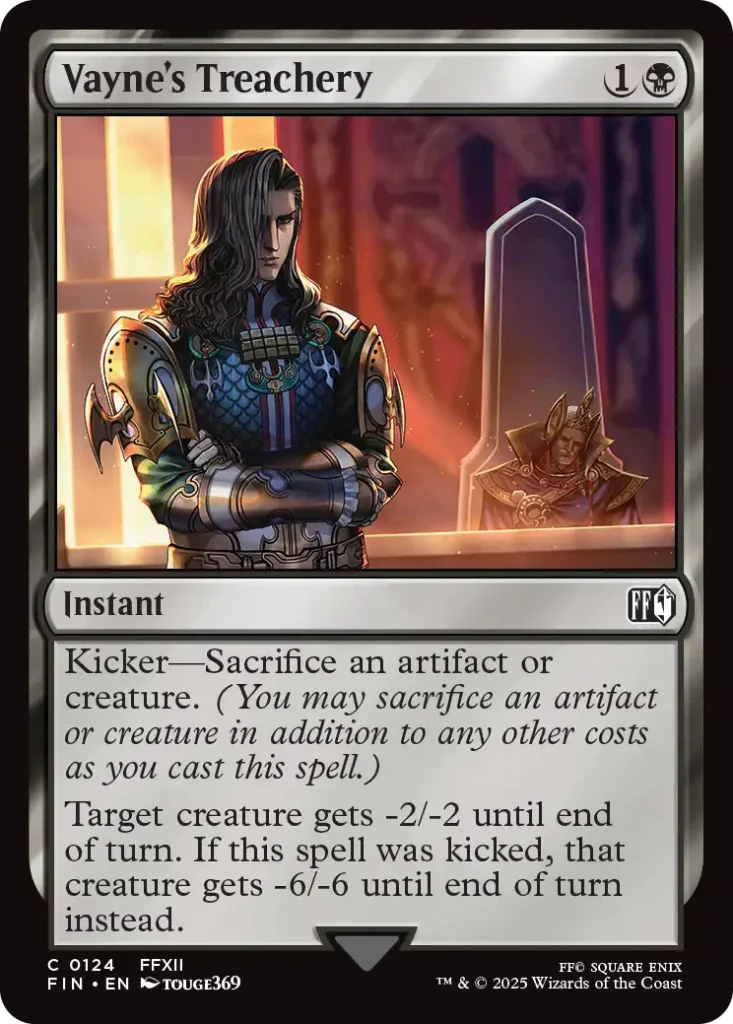
Black also offers a cheaper removal spell with Vayne’s Treachery. -2/-2 cleanly deals with 59 out of 166 creatures (35.5%) in the format. Plus, you can use it mid combat to remove a larger thing.
If you can sacrifice an artifact or a creature, the card gets a massive upgrade, as it now removes basically anything (157 or 94.6% of creatures). That kind of versatility is amazing.
3. Cornered by Black Mages

Would you look at that? The third best black common is also a removal spell. This one comes with a tacked on Wizard token, but requires some setup to really excel. First, you want to be heavy black (at least 10 black sources), so you can actually cast the card on turn 3 consistenly.
Furthermore, you want to aggressively trade with opponent’s creature. This way they won’t have that many option on what to sacrifice, making this sorcery that much stronger.
Honorable Mentions
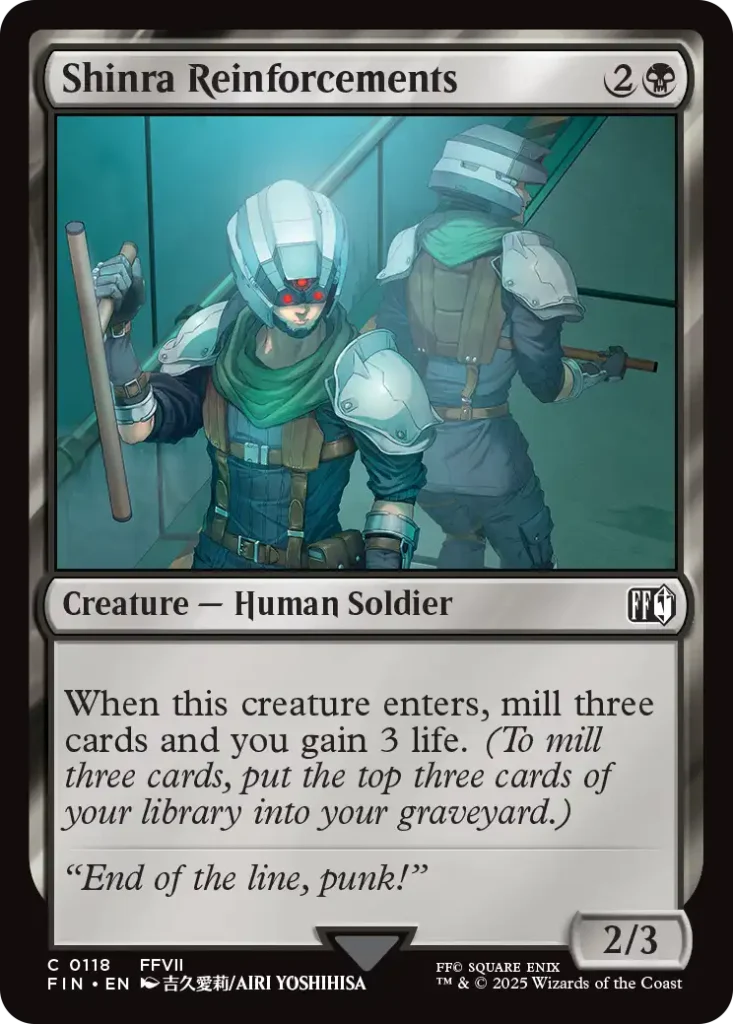
Shinra Reinforcements actually does a lot of work. A 2/3 that gains 3 life is a solid play when your opponent is trying to beat you down. Furthermore, self-mill is quite desirable in most black decks, so that’s another plus.
Cards like Hecteyes seem whatever, but they end up overperforming time and time again. Essentially, the card is a 2-for-1, especially if you need some sacrifice fodder. (Perhaps for the previously mentioned Vayne’s Treachery.)
Malboro is a fine land cycler, as it actually does some work in the late game. A copy is fine in most black decks, particularly when you care about creatures/permanents in the graveyard.
Red
1. Thunder Magic

Appropriately, this instant is quite similar to Ice Magic. First option, one mana for 2 damage is a solid common in a lot of draft formats. The same goes for the second option of four mana for 4 damage. Once you combine these two into a single card, you get an amazing removal spell.
And that’s even without taking into account the third, seven mana option, which further improves the card. This will end up being a key interaction piece for all red decks.
2. Suplex
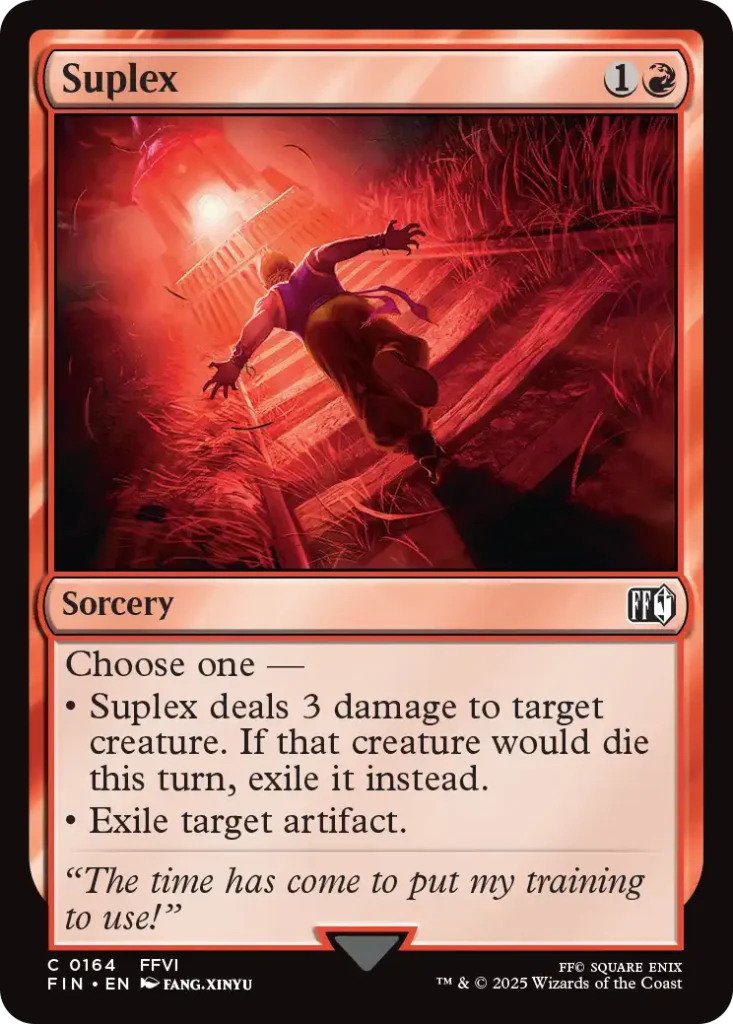
Sorcery speed hurts, but 3 damage for two mana is still a good deal, as it deals with most early plays (61.4% of all creatures). The artifact removal option will also occassionaly come in handy, particularly against some strong Equipment.
3. Call the Mountain Chocobo
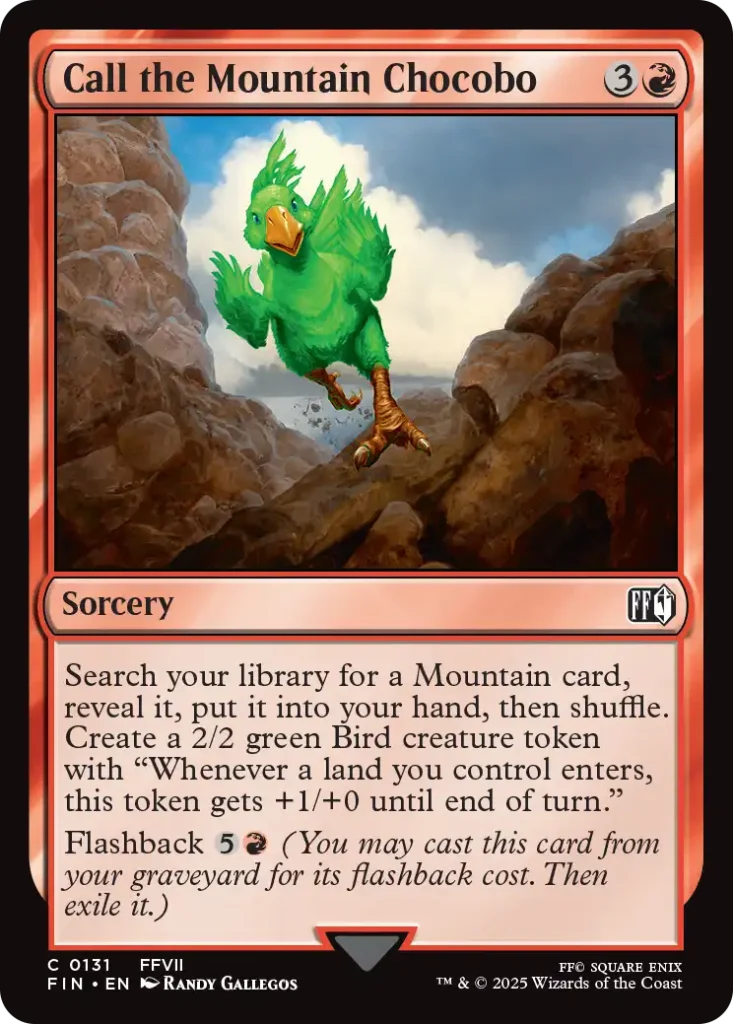
If you have a lot of stuff to do with your mana in the late game, Call the Mountain Chocobo is a nice role player. Your making sure that you’re hitting your land drops even in the late game. Be it for casting expensive spells, or simply triggering landfall effects.
The card plays nicely with all the cards that care about casting noncreature spells that cost 4 or more. With flashback you can easily get two triggers out of it.
Then again, the card doesn’t that amazing in the more aggressive decks, so keep that in mind when drafting.
Honorable Mentions
If you don’t already have too many four drops, Warrior’s Sword can be a nice option. Particularly when your deck cares about Equipment synergies.
You need some support to make Blazing Bomb really pop, but if you do, it pays you off for the mere investment of a single mana.
Green
1. Town Greeter

Town Greeter will make sure that you’re finding your lands when they matter most – in the early game. The Town bonus is nice, but you’d play the card even without that line. Furthermore, the card enables graveyard synergies, which is another plus.
Removing that early mana-screw problem is so great, especially when there’s so much you can do with your mana in Final Fantasy drafts. For example, you could cast this next card for five.
2. Summon: Fat Chocobo
This creature saga has a lot going for it. It provides you with a couple of creatures with 6/6 worth of stats. Furthermore, it comes with four chapter, which is one more than most creature sagas.
This means that you can either trade Fat Chocobo or keep it around long enough to generate enough value from its effects. The first one you play, already tips the scales in your favor, but any additional ones you cast afterwards can feel backbreaking for your opponent.
3. Chocobo Kick
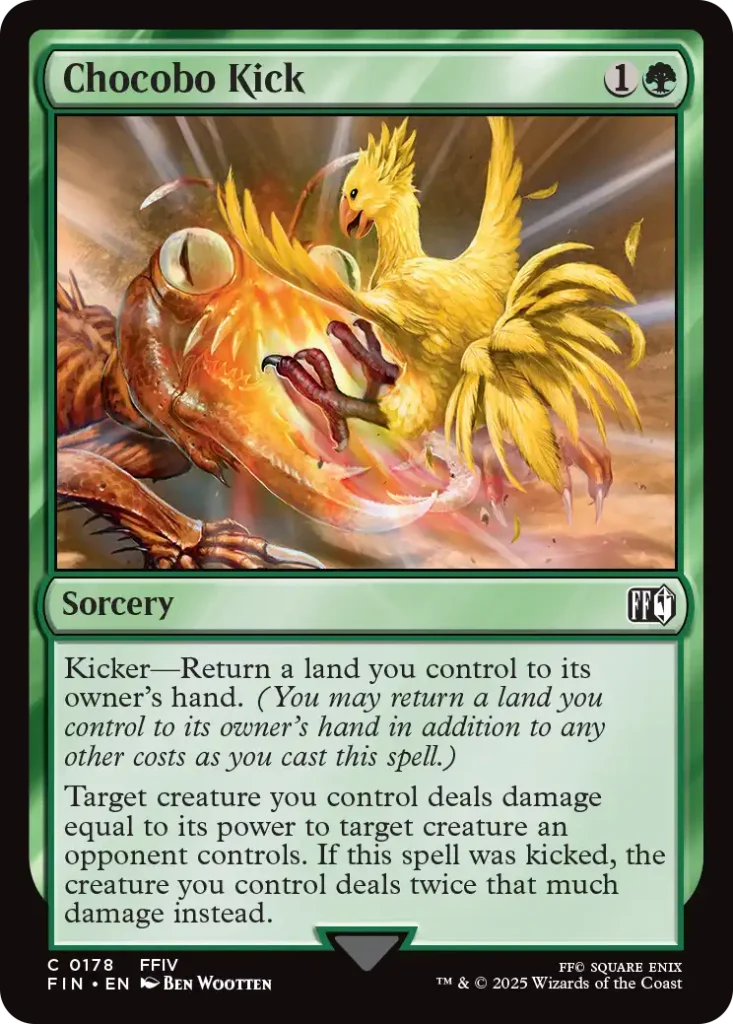
Even without the kicker part, Chocobo Kick would already be a strong removal spell. Your creature doesn’t take damage, and two mana is fairly cheap for this effect.
Being able to deal double the damage makes sure that you can take care of pretty much anything. This will be especially relevant in the late game, when you don’t mind bouncing a land anyway. With landfall cards, this could even be considered a benefit of sorts, and you might want to use it, even when the double damage doesn’t matter.
Honorable Mentions
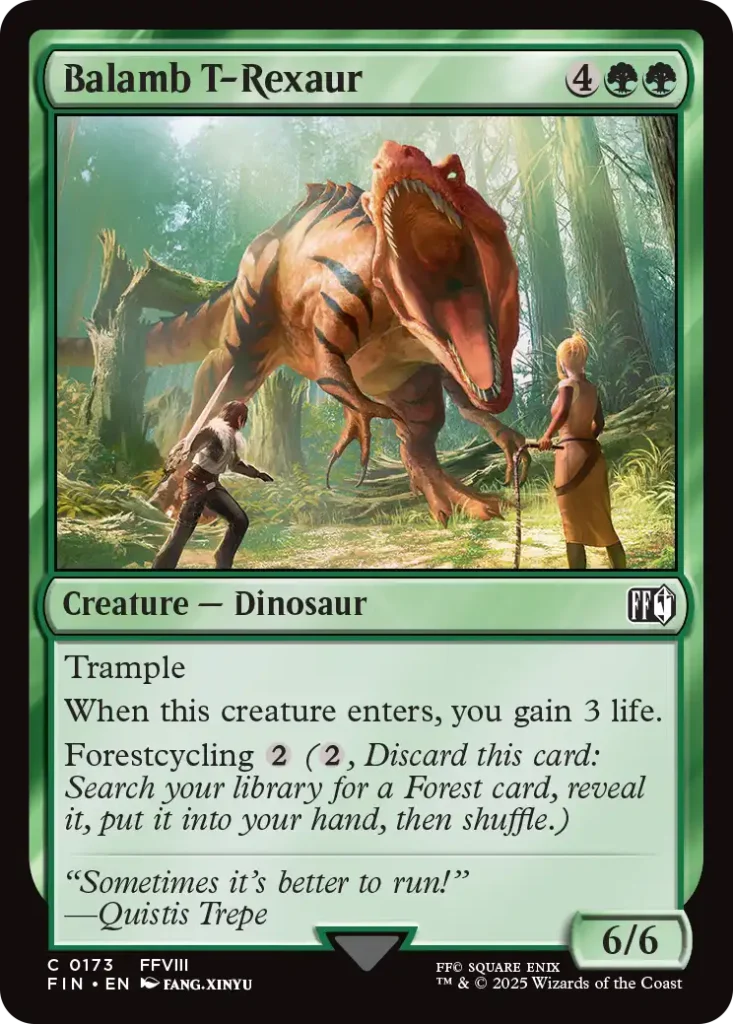
Each color gets a creature with landcycling, but the best one is certainly the green one, Balamb T-Rexaur. Six mana 6/6 trampler that gains 3 life is already a strong common on its own. The addition of forestcycling removes its main downside: not having enough lands to cast it. This way, you can easily put multiples in your deck.
Those expensive green cards become even better if you can cast them a turn earlier. Goobbue Gardener helps you do just that.
As far as one mana play go, Gran Pulse Ochu is a nice one. It trades up, but can also become a massive threat when the game goes long enough.
Final Fantasy Draft Archetypes
There are ten 2-color archetypes in the Final Fantasy draft. You could splash a third color for a powerful card, but for the most part, you should stick to two colors.
Each archetype features a different theme, but you don’t need to go all-in on building around them. They are just general directions in which you should build your decks. For example, you should usually pick efficient removal spells over cards that work well in your strategy, but lack the raw power level.
With that said, why don’t we jump right in? As you’ll notice, most of the themes are quite traditional Magic themes, but sometimes there is a small twist to them.
Blue-White: Artifacts


When you’re drafting blue-white, you want to play lots of artifacts. There isn’t a specific mechanic that rewards you for doing so. Instead, the payoffs differ from card to card.
Here are just a few examples:
- In a deck full of artifacts, Ashe, Princess of Dalmasca provides card advantage.
- On the other hand, Rook Turret allows you to filter your cards.
- Cargo Ship can help you cast your artifacts ahead of schedule.
- At seven mana, Valkyrie Aerial Unit isn’t exciting, but becomes much better with a couple (or more!) artifacts in play.
You don’t need to draft all the artifacts you can get your hands onto, but you should ask: “Is it an artifact?” as a tiebreaker. Let’s say, there are two cards in the pack of somewhat similar quality (an artifact and a nonartifact). If you’re in blue and white, you should pick the artifact.
Black-White: Sacrifice (Artifacts or Creatures)


Sacrifice is a recurring theme for black and white. Usually, you need to sacrifice creatures, but this time around, you’ll have another option in artifacts.
However, the whole sacrifice theme actually isn’t that present. The strong non-rare outlets (cards that allow you to sacrifice things for various benefits) are scarce. Some of the worthy mentions include:
- Ahriman comes with a steep cost, but provides repeatable card draw.
- Speaking of drawing cards, Reno and Rude can essentially get them from your opponent’s deck. (Provided you jump through some hoops.)
- Phantom Train is deceptively powerful with enough sacrifice fodder.
- The backside of Sidequest: Catch a Fish can buff your whole board.
- Vayne’s Treachery becomes a spectacular removal spell, if you’ve got fodder.
While these are all fine to good, you don’t want to completely build your deck around them. Instead, you want to pair them with cards that are strong on their own. Nevertheless, if they do provide fodder, that’s a significant plus.
Sacrifice Fodder
Fodder are creatures and artifacts that you don’t mind sacrificing. As you might imagine, you don’t want to sacrifice a strong creature, like Judge Magister Gabranth. But a Treasure token from Undercity Dire Rat or perhaps Rufus Shinra‘s dog? Don’t mind if I do.
Then again, these are all somewhat playable cards on their own. You don’t want to play something like Magic Pot, even though it gives your two things to sacrifice. The rate on the card is just too bad.
Green-White: Go Wide


This color pair once again deploys its three step plan:
- Put lots of creatures into play.
- Buff them.
- Attack for the win. (If you don’t succeed at first, try attacking some more.)
The strategy is sound and true, and there’s no reason for it not to work in the Final Fantasy draft. If you want to try it, you’ll need some cards that can make multiple creatures.
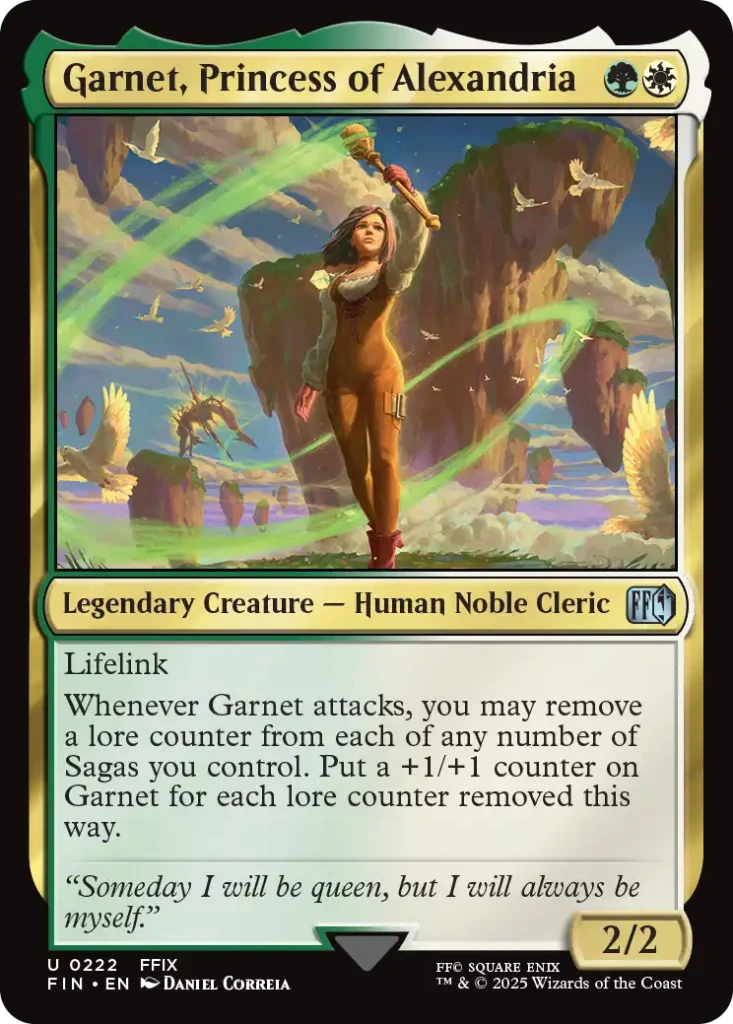
Thankfully, you’ve got a lot of options in both colors. There’s Aerith Rescue Mission, Rinoa Heartilly, Summon: Fat Chocobo, and Quina, Qu Gourmet, just to name a few.
Some token makers, such as Rinoa Heartilly and The Crystal’s Chosen also support the step 2 of your plan. Another option to finish a game when you’ve got a lot of creatures in play is with Auron’s Inspiration or Ridya’s Return.
An important thing to keep in mind is that you don’t need a ton of finishers. One or two would do just fine. Instead, you should prioritize cards that can make multiple bodies. After all, your finishers will be much worse when you don’t control enough creatures.
Red-White: Equipment Aggro


As usual, red-white is an aggressive deck. In order to have a strong aggro deck, you want cheap, efficient creatures. You pair them with good removal, and only a few of the best 4+ mana plays, and you’re good to go.
This time around, you’ll also want to add some Equipment in the mix, as there are some synergies with them, mainly with cards like:
- Adelbert Steiner, which becomes larger;
- Weapons Vendor, which provides cheap equip.
- Freya Crescent, which ramps you into Equipment.
- Giott, King of the Dwarves, which improves the quality of cards in your hand.
In most draft formats, Equipment theme is fairly hard to support. If you were to add a lot of Equipment into your deck, while still playing removal and combat spells, you’re left with not enough slots for creatures. During the game you can end up with multiple Equipment in play, but without creatures to equip them to.
However, that won’t be a problem in FF draft, as you’ve got the Job Select mechanic. With its help you your Equipment are actually creatures. You’ll want to pick a lot of those, as they’ll play pretty well with your synergies.
Blue-Black: Control


When drafting blue-black, you’re essentially building a good old control deck.
Whereas an aggressive deck is looking to end the game quickly, control decks prefer longer games. In the early game, they usually play lots of removal (Overkill, Vayne’s Treachery
) and counterspells (Syncopate) to deal with opponent’s threats.
You don’t mind trading cards one-for-one, as you’re also playing a lot of card advantage spells. So, if you manage to prevent opponent from winning quickly, you should pull ahead in the late game with spells like Travel the Overworld and Ultimecia, Time Sorceress.
Graveyard Synergies
As you can see from Ultimecia, there are some synergies with the graveyard here. You’ve got a few flashback spells, such as Dreams of Laguna and Swallowed by Leviathan.
You don’t need to go out of your way to enable these, but cards like Shinra Reinforcements and Locke Cole become even better, as they help you with this subtheme.
One final note: just because you want the games to go long, you shouldn’t jam a bunch of expensive cards in your deck. You still want to affect the board early with cheap interaction and blockers.
Black-Green: Graveyard Value


Now if you want to draft a deck that leans more into all this graveyard stuff, you should go with black-green. This is also a slower deck, as it will generate more and more value as the game goes longer.
How? Well, some great cards that benefit from a full graveyard include:
- Cloud of Darkness is a flyer that can also double up as a removal spell.
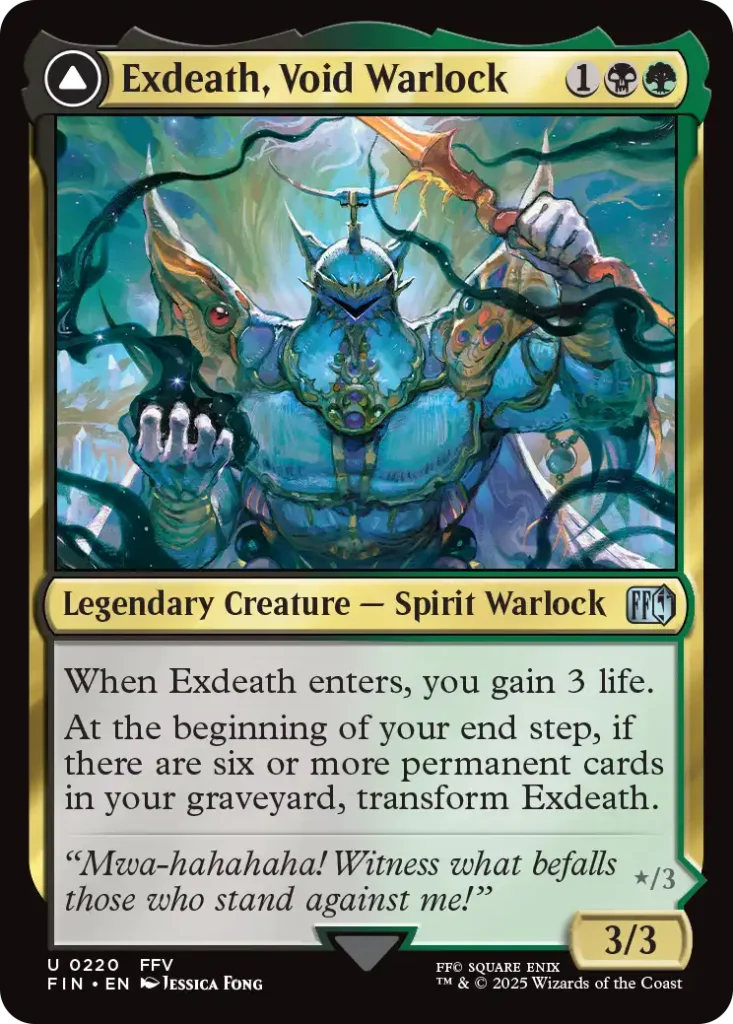
- Already a strong card, Exdeath, Void Warlock becomes even stronger with enough permanents in your graveyard.
- The Final Days first gives you a couple of 2/2s, but can be recast to bring a massive army to dominate the board.
- Diamond Weapon is a massive creature, which becomes undercosted as the game goes longer.
Finally, you can live the dream of melding Fang, Fearless l’Cie and Vanille, Cheerful l’Cie together. You don’t even need to work hard for that. Both cards are pretty good on their own and the meld ability is just an awesome bonus.
Permanents in Graveyard
Pretty much all cards here care specifically about permanent cards in graveyard. That means that everything counts except instants and sorceries.
Thus, you should probably try to minimize the amount of those two card types you play. The few spots you have for that should go to the best ones, usually something like great removal spells. (Examples: Clash of the Eikons, Overkill)
Also, self-mill cards that are already good on their own, become even stronger here. They allow you to fill your graveyard fast. Two main options at common would be Shinra Reinforcements and Town Greeter.
Blue-Red: Expensive Noncreature Spells


In most modern sets, blue-red ends up with the noncreature spells theme. This time around, there’s a little twist to it. You’ll get additional benefits only if your noncreature spells cost 4 or more mana.
So, you won’t be trying to just cast as many cheap instants in sorceries as you can. Instead, you’ll want to focus on the expensive stuff. There’s one problem that might occur with that. Your deck might be a bit clunky, with lots of expensive spells. Usually, the best decks in most draft formats play a bunch of cheap spells.
Does that mean that this theme won’t work? Well, let’s first take a look at the payoffs, to see whether they’re worth building around.
Payoffs
Most of them are like Prompto Argentum or Ultros, Obnoxious Octopus. Playable cards, with nice bonuses, but not something really worth building around.
On the other hand, you’ve got Shantotto, Tactician Magician and The Emperor of Palamecia, both of which offer meaningful rewards. If you’ve got your hands on both of these, you might want to look for some 4+ mana noncreatures.
Red also offers some cards that just care about noncreatures, without any costing restrictions. For example, there’s Mysidian Elder, Queen Brahne, and Summon: Esper Ramuh
. These can enable a more traditional blue-red deck.
Enablers
At first look, there doesn’t seem to be that many amazing noncreature spells that cost 4 or more mana in these two colors. A couple of fine options seem to be Eject and Retrieve the Esper.
However, you don’t need spells that actually cost 4 mana. You just need to spend that much mana on them. This means that second or third mode on Ice Magic and Thunder Magic does the trick. So will cards with pricey flashback when you recast them, such as Dreams of Laguna.
Once you account for these cards, there seem to be enough of solid enablers. Plus, they aren’t even that clunky, as you can cast them for cheaper if necessary. As such, blue-red has a real possibility of working out.
But what if you want to enable the other theme, where all noncreature spells matter? Well, we’ll talk more about that in the next archetypes’s section.
Black-Red: Black Mage Aggro


Whereas other aggressive decks, might have trouble finishing the game, this archetype uses black mages to help deal some damage.
What do we mean by black mages? That refers to the 0/1 tokens, that deal 1 damage to opponent whenever you cast a noncreature spells. They are created by the following cards:
Furthermore, Black Mage’s Rod and Black Waltz No. 3 fill that same role. That means that in total, there are 6 nonrare cards that can provide you with this effect. It probably shouldn’t be too hard to draft multiples of them, at which point your noncreature spells will easily dome your opponents for 2+ damage.
Enablers
You could build a deck that will try to sneak in some early damage, and than just finish the job with those Wizard tokens. Some good support cards to include in the mix would be:
- most Job Select Equipment, as they are creatures that count as noncreatures
- basically any removal spell
- cheap noncreature cards that replace themselves (Instant Ramen, Opera Love Song)
- Laughing Mad can make sure that you don’t run out of cards, and can be flashed back.
For this archetype, you’ll want to prioritize Mage makers first, and enablers second. If you manage to build your deck correctly, your opponents will be forced to spend removal on the 0/1s, which you’re perfectly fine with.
Of course, you’ll also be able to benefit from other cards that care about noncreature spells, such as Garland, Knight of Cornelia and Summon: Esper Ramuh.
Red-Green: Landfall Aggro


Landfall, a popular returning mechanic is the main focus of the red-green archetype. Cards with landfall provide various benefits whenever you play a land.
For example, Gladiolus Amicitia and Ride the Shoopuf buff your creatures, while Rydia, Summoner of Mist filters your cards.
Similarly to black-red (with its 0/1 Wizard token), red-green also highlights a token. That’s a 2/2 Bird that gets +1/+0 whenever one of your lands comes into play. Some of the best ones would be:
- Chocobo Racetrack, which can generate multiple Birds over the course of the game.
- Choco-Comet – both a removal spell and a Bird in one card. (You could also just close out the game with it by targeting your opponent.)
- Call the Mountain Chocobo providing both a Bird and a Mountain to trigger it. Flashback is also useful.
Typically, these will only trigger on your turn, so you want to be more aggressive to take advantage of your Birds’ higher power. Have a lower curve, and perhaps use a few combat tricks to punish your opponents for blocking.
You don’t need to do much to build around this archetype. You’d be playing 17-18 lands in your deck anyways. It’s just nice that you get an additional benefit from doing so, which is why landfall is such a popular mechanic.
Now, one thing you could do is to play some ramp cards, as that can give you multiple landfall triggers per turn. Let’s talk more about that in the next section, though.
Blue-Green: Town Ramp


Our final archetype is less aggressive, but it also cares about lands. In blue-green, you’ll be ramping, and get some additional benefits from lands with the Town subtype.
If you’re unfamiliar with the term ramp, it refers to putting extra lands or mana producers in play. The benefit of doing so is that you’re able to cast expensive, powerful spells ahead of schedule.
This strategy is nicely represented by the two gold uncommons. Ignis Scientia ramps you, so you can cast Omega, Heartless Evoultion earlier. That’s a massive creature that can lock down an opponents creature and gain you some life. It cares about nonbasic lands, which in Final Fantasy draft, will be Towns.
Towns Synergies
There are 15 nonrare Town lands in this set. There’s a cycle of ten dual lands, such as Guadosalam, Farplane Gateway. Furthermore, there are five utility lands, like Eden, Seat of the Sanctum and Capital City.
Those are useful, and you can search for them with a couple of good ramp spells in Prishe’s Wanderings and Reach the Horizon. Furthermore, Town Greeter can give you a couple of life, if you manage to find a Town with it.
However, the two biggest payoffs are the two card advantage effects in Qiqirn Mechant and Travel the Overworld. With enough Towns in play, you’ll be able to refill your hand for cheap.
Given that you’re ramping you also can also reliably cast powerful green creatures such as Balamb T-Rexaur and Coliseum Behemoth. Just make sure that you don’t clog your deck with too many expensive cards. You still need early plays, otherwise your aggro opponents will just run over you.
And that’s it for the archetype overview. It’s time for…
Additional Tips for Final Fantasy Draft
Niche Scenarios
Here are just a few niche scenarios, that probably won’t come up that often. However, when they do, it will be nice to recognize them. More will be added, as we play more games of the format.
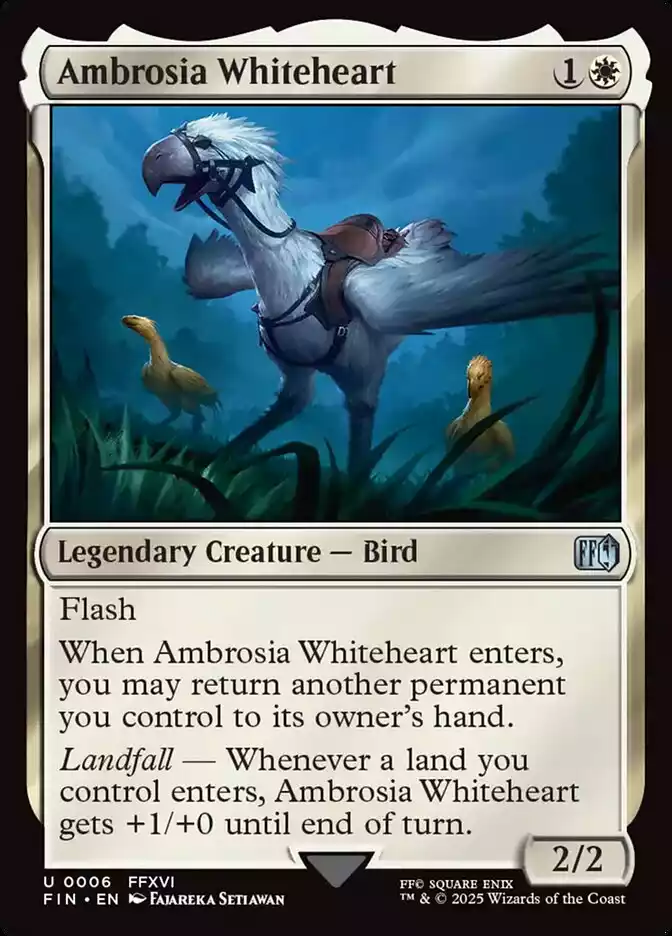
- You can put the last chapter of a creature saga on the stack, then respond to it with cards like Ambrosia Whiteheart or Vincent’s Limit Break. This way, you get both the last chapter’s effect plus you can rebuy the saga.
- If you remove and put a lore counter on your saga with Clash of the Eikons, its current chapter will trigger again. Just removing a counter doesn’t do anything right away, but it does allow you to keep the saga around for longer.
- You should use Sandworm on your lands to trigger your landfall cards. If you don’t control any landfall cards, still target yourself. You are somewhat thinning your deck, but more importantly, your opponent could be splashing third color, which they’re currently missing. (If they control, something like Balamb Garden, SeeD Academy you should definitely destroy it though.)
Wraths
Knowing which wraths are in the format can help you play around them – when possible. Especially once your opponent isn’t playing anything meaningful, and seemingly waits for you to over-commit.

There’s an unconditional one in Ultima. This one also stops any dies-effects. Furthermore, there’s Nibelheim Aflame, which can be stopped by a timely removal spell.
Fire Magic is also worth mentioning as it can be used at instant speed and is an uncommon. Typically, it won’t kill bigger creatures, unless used post combat.
Final Fantasy Draft Tier List
This was a lot of big picture information, but what about specific cards? Well, you can check our Final Fantasy Tier List. In that article, you can find grades for each and every card you can open in FF Play Boosters.
You can browse through all of them to find out what each card does, and learn which cards are the best bombs, that you simply shouldn’t pass during the draft.
Conclusion
With that we’re wrapping up our Final Fantasy Draft Guide. At least for a little while, anyways. In the upcoming weeks, the article will be updated, as we learn more about the format.
If you plan to draft at home with your play group, or your partner (by doing a 2-player draft), you’re going to need some FF Play boosters. You can already preorder them on Amazon.

Also, if you’re a Commander fan, don’t forget to check our article about all four Final Fantasy Commander precons. These deck truly are something special.
Until next time, have fun, and may you win many games of your Final Fantasy drafts!