
Are you often losing your draft matches? That’s rough, buddy. But don’t worry — our Avatar Draft Guide is here to help you master the four elements and boost your win rate. Whether you’re a beginner or a more experienced drafter, you’ll find out what’s going on in this format and how to approach it.
If you’ve been reading our guides for a while (Welcome back!), you already know what to expect from this article. If not (Hey there, new friend!) here’s a quick breakdown.
First, we’ll explore the main mechanics and learn how to best utilize them. Next up are the best commons, followed by the archetype overview. Finally, we wrap things up with some additional tips, including a Tier List with grades for each card in the set.
There’s a lot of ground to cover, and since we don’t own a flying bison, let’s jump right in.
Table of Contents
Avatar Mechanics
You’ll encounter five main mechanics in the Avatar draft. Four of them are brand-new, one for each bending style, each tied to a single color (with a few exceptions). The fifth mechanic is a returning one, but with a minor twist:
- Airbending (white)
- Waterbending (blue)
- Earthbending (green)
- Firebending (red)
- Lessons (in all five colors)
We’ll explore each one in more details, providing examples and a discussing of how they affect the Avatar draft format. For each mechanic, there’s a link you can follow for more in-depth information.
Airbending
A card may instruct you to airbend a nonland permanent. (Sometimes specifying a creature, or even a creature you control.) This means you exile it. While it remains exiled, its owner can cast it by paying two mana of any color. (Instead of its regular cost.)

For example, when Aang, the Last Airbender enters, you airbend up to one other target nonland permanent. It’ll go in exile, and its owner can recast it again for a couple of mana.
Airbending’s Flexibility
There’s a lot of flexibility to this mechanic, and it can be useful in pretty much any scenario. Most of the time, you’ll want to exile an opponent’s creature.
If you’re ahead and more aggressive, you’ll simply remove their biggest blocker. Sure, your opponent can replay it, but they need to spend two mana to do so. That’s mana that won’t be spent on other spells — this will give you a tempo advantage.
When you’re behind, just get rid of opponent’s best attacker. It won’t be attacking you next turn, and your opponent has to spend mana to deploy it again.
Don’t forget that you can also airbend your own creatures or other nonland permanents. Most of the time you’d do so to get another enters-trigger. Sometimes just to “untap” your tapped creature by replaying it. You could also save your creature from negative auras (that sounds like some kind of gen Z slang). There are a few of those in the set, like Path of Redemption and Watery Grasp.
All in all, there are a lot of unique ways in which you can use this mechanic. (A big flavor win!) Thus, it’s a powerful effect, so you should value it highly. Pretty much every card with this mechanic is at least playable, if not actively good.
The presence of airbending makes expensive permanents without enters-effects significantly worse.
You can find detailed airbend rules here.
Waterbending
Waterbend is a new cost, that allows you to tap your untapped creatures and artifacts, as you’re paying it. Each permanent tapped that way reduces the waterbend cost by one generic mana.

Katara, Bending Prodigy features an waterbend ability that allows you to draw a card. It does cost six mana, which is fairly expensive for this kind of effect. However, you get to tap your untapped creatures and artifacts to reduce it and make it more manageable.
Varying Power Level
Compared to the airbending mechanic, this one isn’t as strong on its own. The power level of waterbend significantly differs from card to card.
Some costs are pricey and only offer mediocre effects. Those won’t be good even with the potential cost reduction. On the other hand, some waterbend cards are strong on their own, so the opportunity for lower cost is simply an additional benefit.
If you want to take the most advantage of this ability, you’ll want to draft cards that make multiple creatures and/or artifacts. (Think Kyoshi Battle Fan.)
This mechanic probably fits best in more defensive decks. You leave your creatures untapped as potential blockers, which still allows you to use them for waterbending on your opponent’s turn.
For more information about this mechanic, read our waterbend rules article.
Earthbending
If a card instructs you to earthbend X, you target your land. It becomes a 0/0 creature with haste and you put X +1+/1 counters on it.
If that land creature dies or is exiled, you return it to the battlefield tapped. (It’s no longer a creature.)

When Toph, the Blind Bandit enters, you earthbend 2. So, you target one of your lands, and it becomes a 0/0 creature with two +1/+1 counters. It’s still a land which means you can still tap it for mana.
If at any point this land dies or is exiled, you return it to the battlefield tapped. That’s a neat effect for draft, as it removes a major downside of turning your lands into creatures. (If that wasn’t the case, your opponent could remove them, and you might not be able to cast your expensive spells.)
Similar to Tokens
How good is this mechanic? Well, earthbend X is kinda similar to creating an X/X token. There’s a downside that sometimes you need to target a tapped land, so the creature essentially “enters” tapped. On the other hand, the land will be able to attack right away, which can be very useful, when you’re the aggressor.
Creatures that earthbend create multiple creatures. Such cards are often really useful in most draft formats, and that hasn’t changes in Avatar draft.
This is a somewhat complex mechanic, so you might want to learn more about earthbend rules.
Firebending
Whenever your creature with firebending X attacks, you get X red mana, which lasts until end of combat.

So, when you attack with Zuko, Exiled Prince, you’ll get 3 red mana. This mana sticks around until end of combat, then it’s gone.
Thankfully, Zuko has an activated ability, that allows you to turn that mana into card advantage.
How to Use Firebending Mana?
Most firebending cards are like that, pretty self-contained. This means most of them give you a way to spend that mana mid-combat.
Naturally, you can also use it to pay for other cards’ abilities or for instants. Combat tricks can be particularly useful, as your opponent is incentivized to trade with your firebending attacker. (To prevent your from gaining mana on your next turn too.)
If you’re spending this mana on an instant that doesn’t affect the combat, you should wait until the end of combat step. That’s after the damage has been dealt, but before your second main phase begins — that’s the last moment to use it before it’s gone.
This way, you won’t give away any information to your opponent, as that could affect their decisions on how to block, which instants to use on your attackers, etc. Keeping your opponent in the dark as long as possible is powerful. (Just ask Zuko, who spent years looking for information about Avatar’s whereabouts.)
When you draft a deck with lots of firebending effects, make sure you’re playing an aggressive deck. This means a lot of cheap spells, with just a few of the best expensive (4+ mana) cards. After all, this mechanic only works on attacks.
For more details, check firebending rules here.
Lessons
The fifth mechanic is lesson, a subtype that can appear on instants and sorceries of all five colors. You might remember them from Strixhaven, when lessons were used with the learn mechanic. (Learn allowed you to grab a lesson card from your sideboard.)
This time around, there is no learn mechanic. Thus, you’ll just play good lesson cards in your main deck, as opposed to putting them in the sideboard.
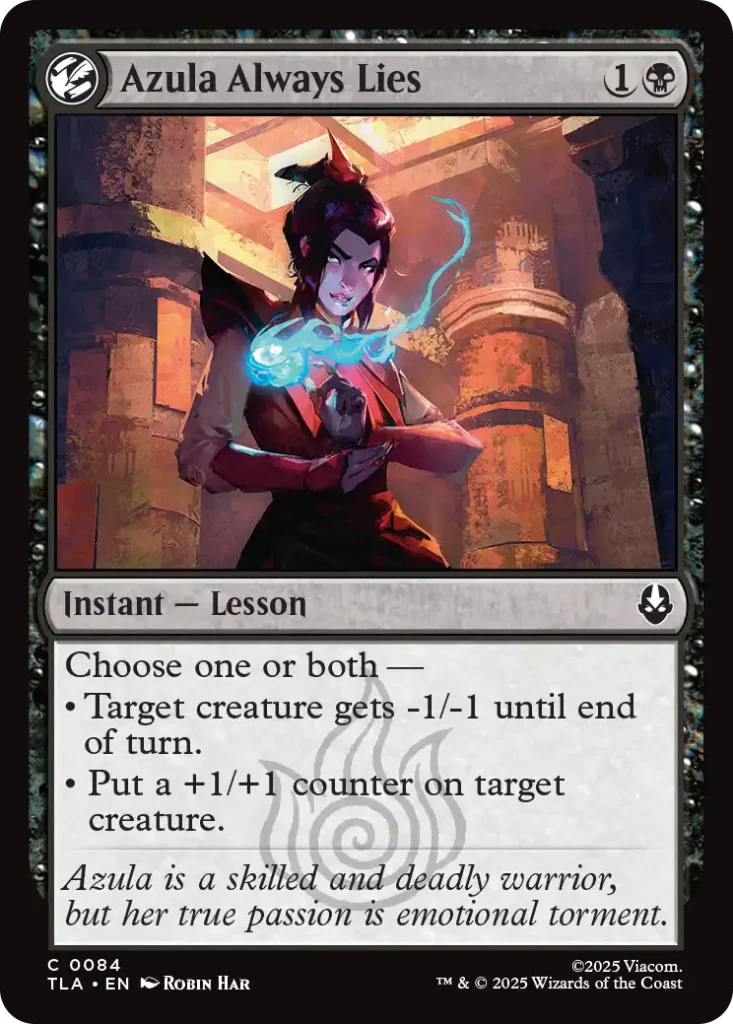
As fans of the show might expect, a useful lesson is that Azula Always Lies. For two mana you can choose one or more likely both options. Putting a +1/+1 counter on your creature, and giving an opponent’s one -1/-1. This will typically be enough to win a combat and keep a counter around. Sometimes you could even eat two creatures, which will feel amazing.
Anyhow, the lesson card type doesn’t do anything by itself, but there are cards that care about lessons.
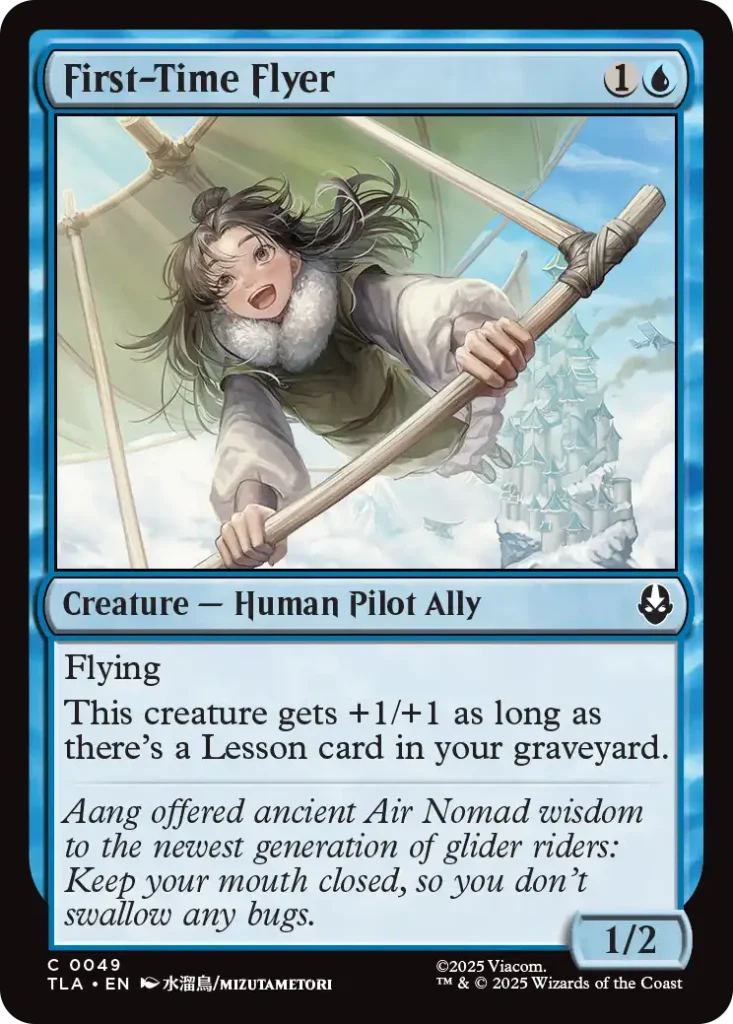
For example, First Time Flyer becomes a 2/3, if you’ve got a Lesson in your graveyard. At that point, it becomes a very potent two drop.
The more such cards you have, the higher you should prioritize playable Lessons.
With that, we’re wrapping up mechanics overview, and it’s take to explore the commons.
Best Commons for Avatar Draft
Commons are the cards you’ll see most often, so it’s important to know which ones are relevant.
White
1. Path to Redemption
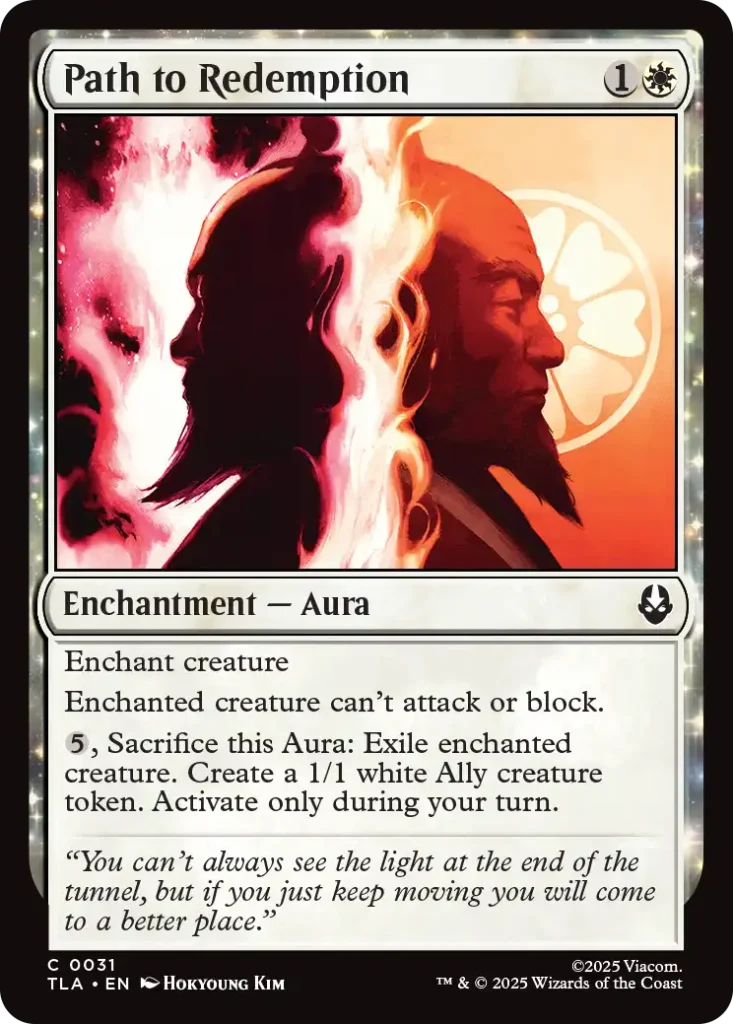
Two mana removal spells are strong, even if there are some downsides to this one. Your opponent might remove it or airbend the enchanted creature. Plus, the creature’s abilities still work.
However, it won’t be able to participate in combat, and you can get rid of it later in the game. (Plus, you’ll get a Ally token for your troubles.)
You shouldn’t underestimate such cheap and versatile removal.
2. Kyoshi Warriors
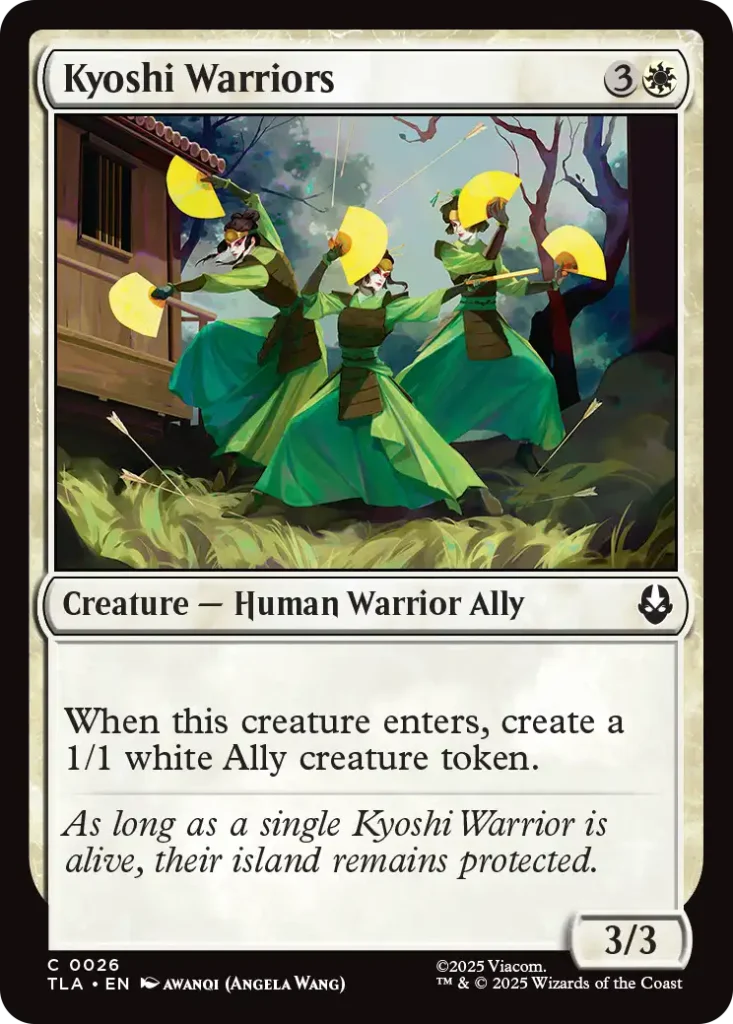
Creatures that create more creatures when they enter often end up among the best commons. Kyoshi Warriors might even become the best white common, depending on how things play out.
After all, there’s a lot of support for the go-wide theme, as you’ll learn in the Archetypes section. Plus, you’re getting two Allies, and quite a few cards care about this creature type.
3. Airbending Lesson

This is perhaps a bit of a hot take, but airbending seems fairly strong. Removing your opponents biggest attacker or blocker (even temporarily) can set them on the back foot. Sure they can replay it, but that’s two mana they aren’t using on other spells.
You’re also getting back a card, which is big plus. If you can use it in the right situation (responding to a combat trick or after you opponent double blocks), you can put yourself in a great spot.
Blue
1. It’ll Quench Ya!
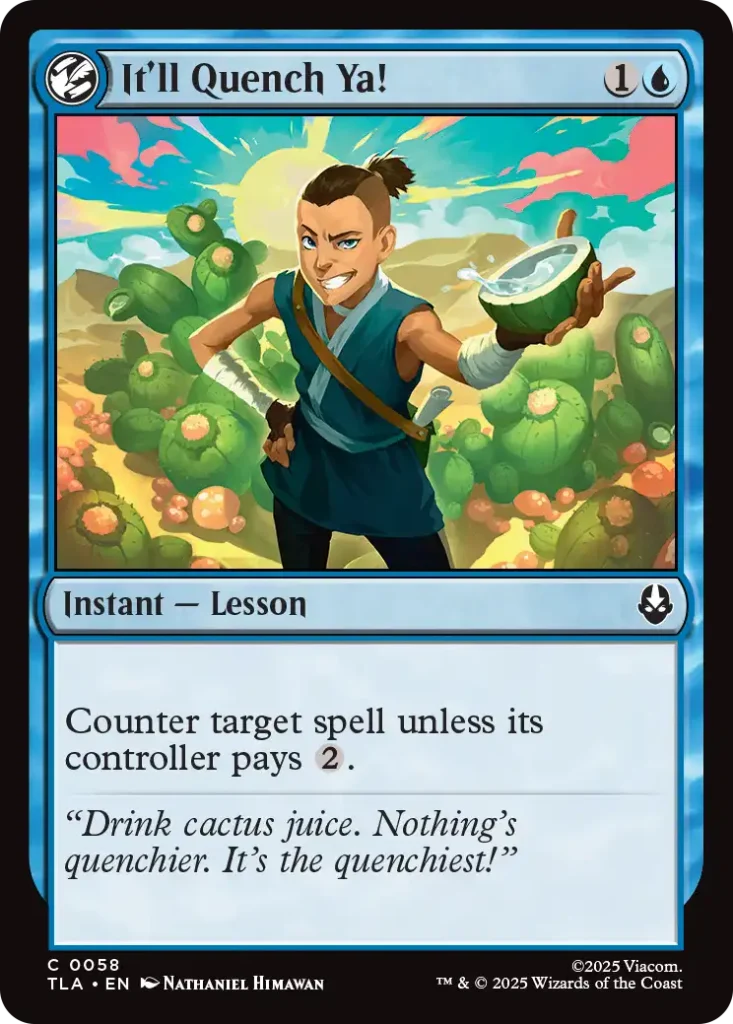
This card is a flavor win. (If you’re unfamiliar — “It’ll Quench Ya!” is a line from the show, and Quench is a Magic card with the same effect.)
But that’s not all it is — you’re getting a really cheap interaction that’s going to be useful both in turn 2 and in the middle of the game. Even later in the game, your opponent might spend most of their mana, so you’ll be able to offer them some cactus juice.
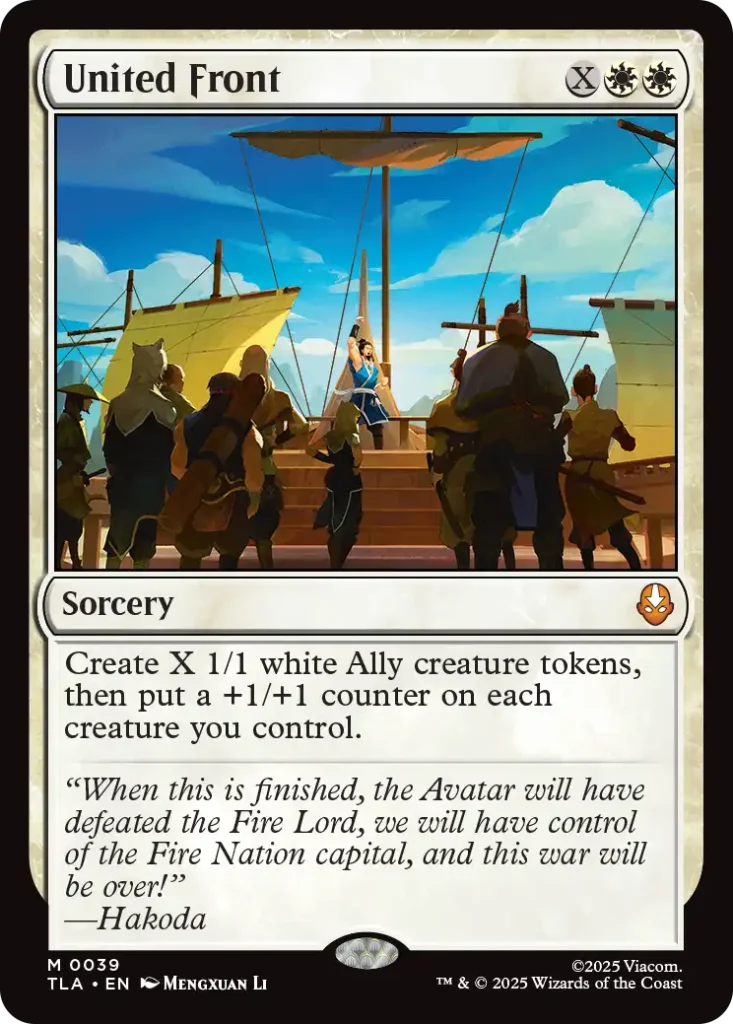
It’s possibility the only common cards that can cleanly deal with some of the best cards in the format. (Such as United Front or Wan Shi Tong, Librarian.) Combine that with the fact, that it’s still live against most other cards, and you end up with a great card.
Also, the card is a Lesson, which is another relevant benefit. When playing against blue, it’s smart to keep this card in mind.
2. Forecasting Fortune Teller
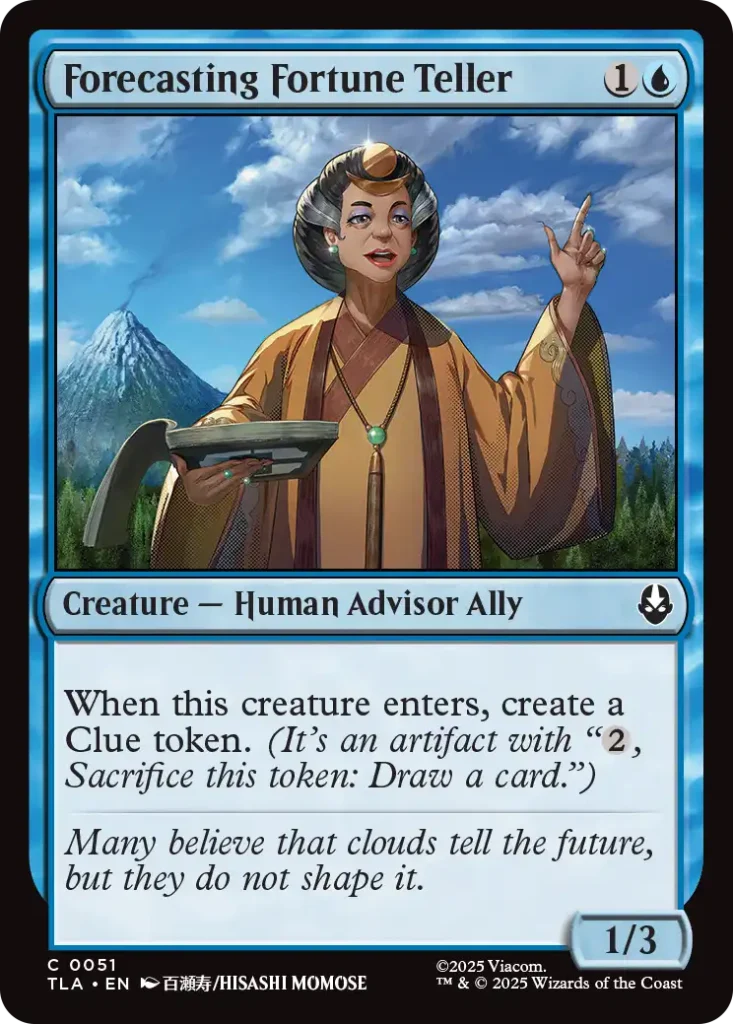
Thraben Inspector was a spectacular card in pretty much every draft format it appeared it. This version comes with a 100% cost increase, which obviously makes the card worse. However, it still might be good enough, particularly if you’re playing lots of waterbending cards in your deck.
Fortune Teller provides both a creature and and artifact, which can help you pay for waterbending costs.
3. First-Time Flyer
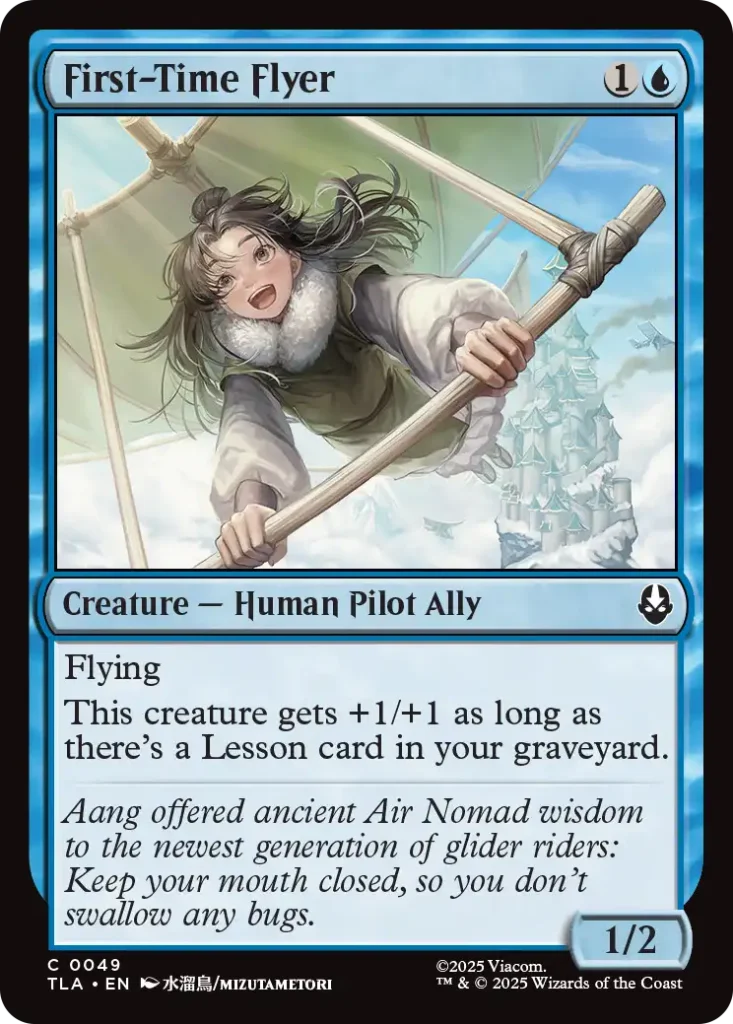
A 1/2 flyer for two mana is pretty bad. On the other hand, a 2/3 flyer is excellent for that cost.
All you need to do to get there is a single Lesson in your graveyard. That shouldn’t be too hard, as there’s a bunch of solid instants and sorceries with that subtype.
That being said, compared to other commons on this list, this is probably the one that needs the most support. You shouldn’t include it in your deck, if you didn’t end up with at least 5 Lessons.
Honorable Mentions

Rowdy Snowballers is a solid tempo play, especially in more aggressive versions of blue deck. Even in a more controlling deck it can work in a pinch, but it’s not as good there. (It removes a blocker from two combat steps, and only prevents attacker from attacking once.)
Waterbending Lesson is a great way to refill your hand. The waterbending cost is a neat bonus, but doesn’t really affect the card’s power level that much. While you don’t want to end up with too many copies of it, one or two will often play nicely.
A quick shout-out to Octopus Form. You usually want exactly one in your blue decks. The first copy can give you a way to blow up an opponent’s play, but it does get worse in multiples.
Black
1. Corrupt Court Official
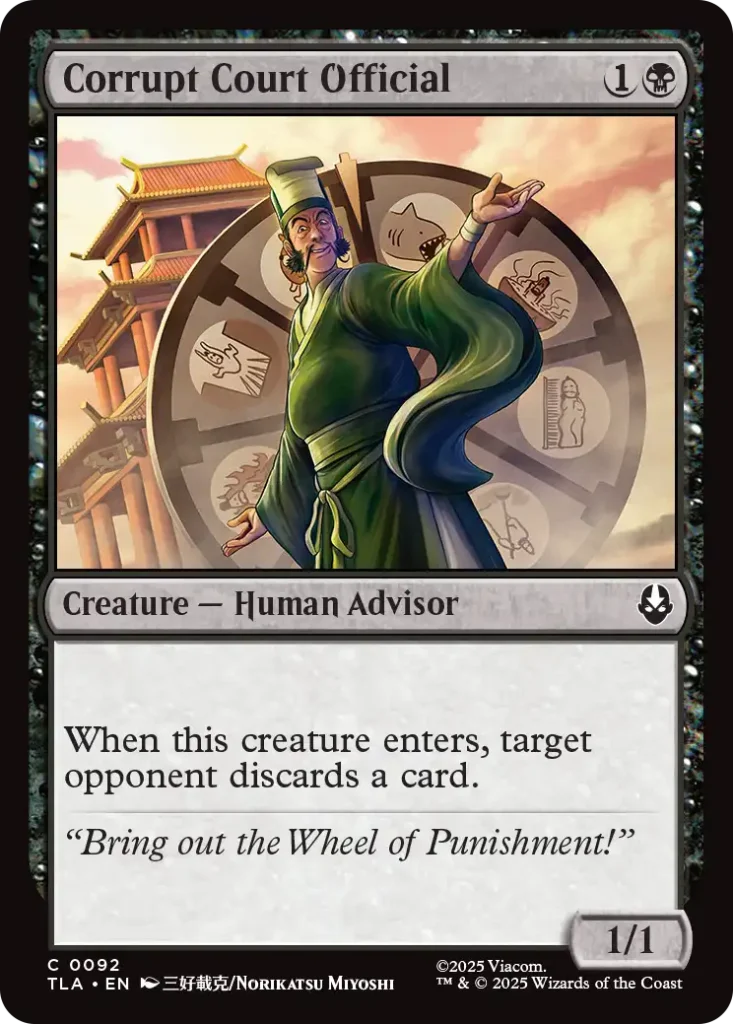
We’ve seen this kind of card multiple times in various draft formats and it’s always performs better than it looks. There are sacrifice synergies present in black, which makes this card into a solid 2-for-1.
It’s a perfectly fine card to play on turn two, and it can also be useful later in game. When you nab that last card from opponent’s hand and it’s a nonland, you’re going to feel great.
When playing against black, you should avoid playing the last land card from your hand if you don’t need it. This way, you’ll have something to pitch in case your opponent draws Corrupt Court Official.
2. Sold Out
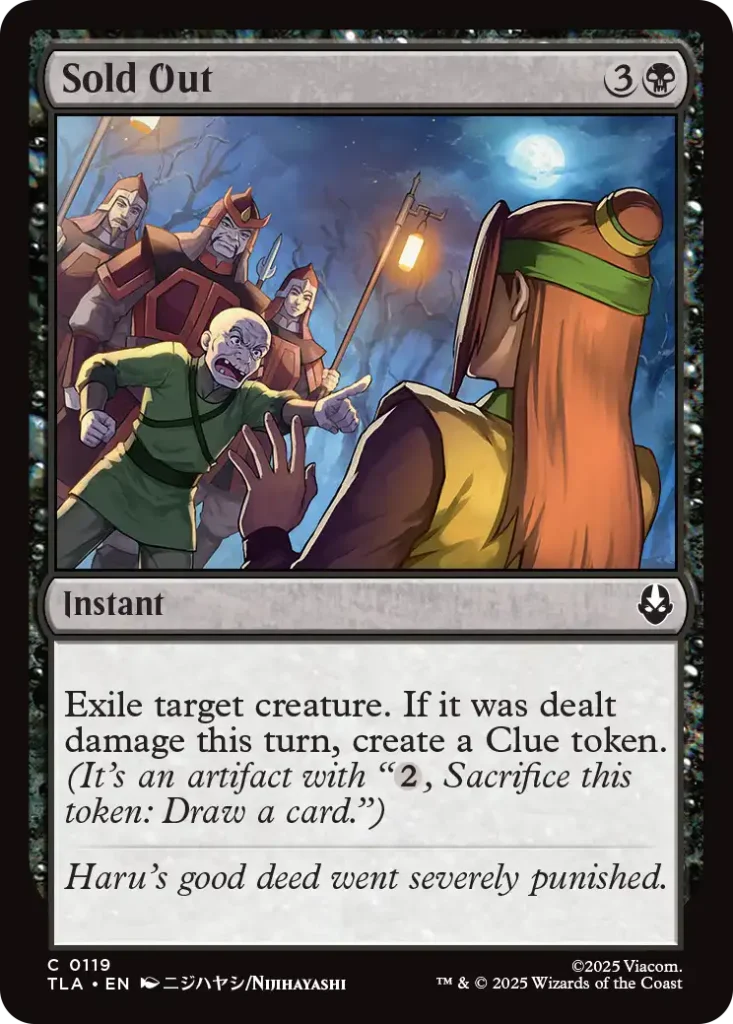
Four mana to exile a creature at instant speed is perfectly fine deal. You need to remove creatures and Sold Out does so cleanly.
Sometimes you might chump block first before playing this in order to get a Clue. However most of the time, that line will be just another kind of flavor text. Thankfully, the card is good enough as it is.
3. Callous Inspector
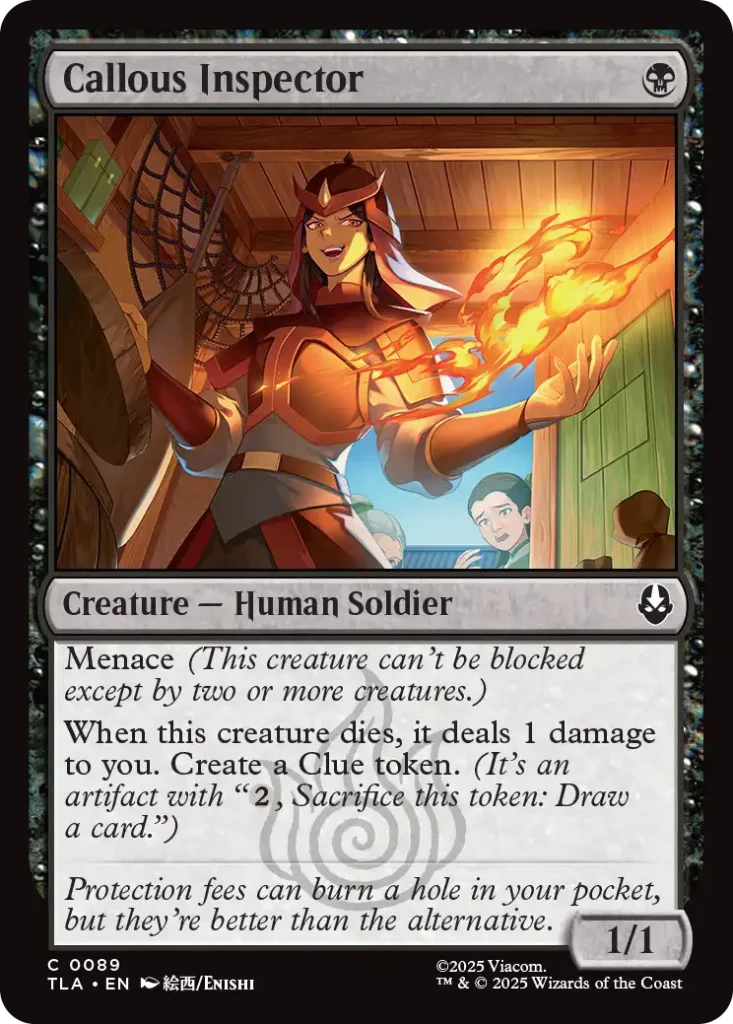
Here’s another Thraben Inspector variant, and the card does a lot for a single mana. If you cast it on your first turn, you’ll probably be able to deal some chip damage. Afterwards, you’ll chump block and get your card back.
If you draw it later in the game, that’s fine too. You’ll spend a black mana that you wouldn’t be able to spend otherwise, allowing you to cast multiple spells in a turn. (That’s always a nice way to get ahead in a game.)
Of course, it also works with sacrifice theme, giving you both a creature and eventually a Clue to use as a sacrifice fodder.
Honorable Mentions

You have already seen a couple of black common creatures that you won’t mind sacrificing. They’ll play nicely with Deadly Precision, making it a really potent removal spell. At five mana it is a bit clunky, but it’s still nice to have the option to do so.
We’ve already mentioned Azula Always Lies. It’s neat cheap interactive spell, that’s going to play quite nicely.
Swampsnare Trap is a good removal spell, even if it’s a bit unusual. While it’s not able to straight up destroy larger creatures, it will significantly reduce their stats making them obsolete.
Red
1. Treetop Freedom Fighters
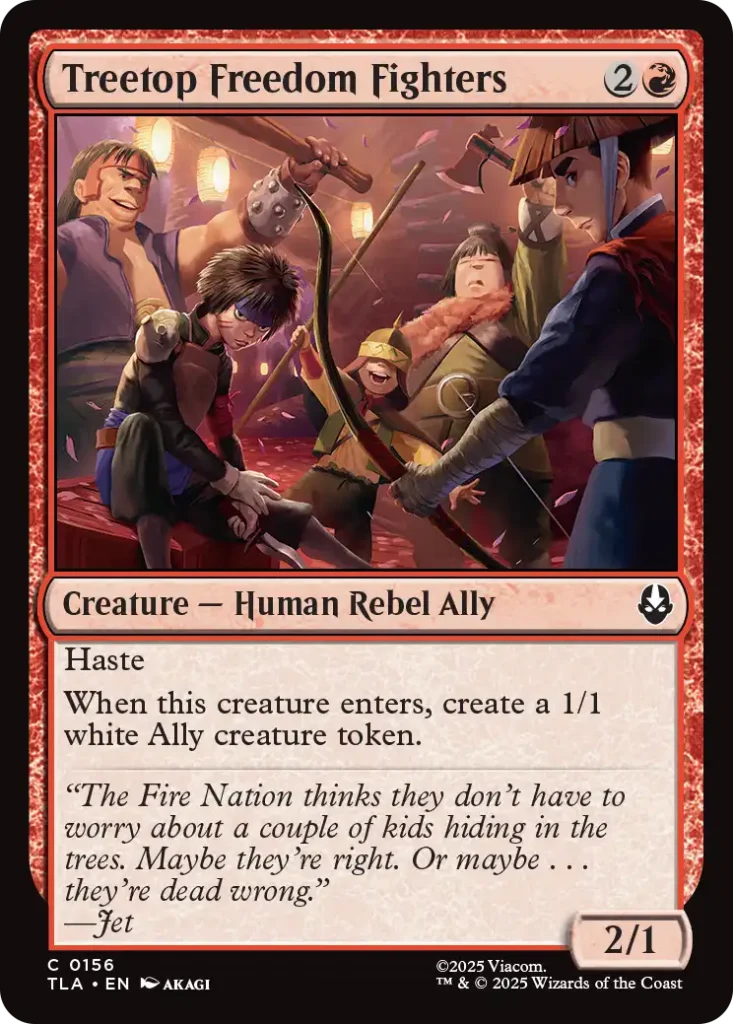
Pretty much everything we said about Kyoshi Warriors also applies here. Sure the stats are a bit different, but you’re still getting a couple of Allies from the same card.
You can’t really go wrong with this card, and you won’t mind playing multiples of it. You can make it even better by including ways to mass pump your creatures, and there are a few of those in Avatar draft.
2. Firebending Lesson

Cheap removal for small creatures early, and expensive removal for larger creatures in one card. The versatility is certainly welcome, and in many sets this could’ve easily been the best red common.
However, as you’ll see from the next two cards, there’s no shortage of solid red burn spells. Thus, you don’t need to get out of your way to pick a specific one really highly, but you can probably get a mix of them when drafting red.
3. Lightning Strike

Strike is also a solid card. It always costs two, it always deals three. Compared to the previous card, it can also target your opponent, which is something you shouldn’t miss, as it can just win you the game on the spot.
Honorable Mentions
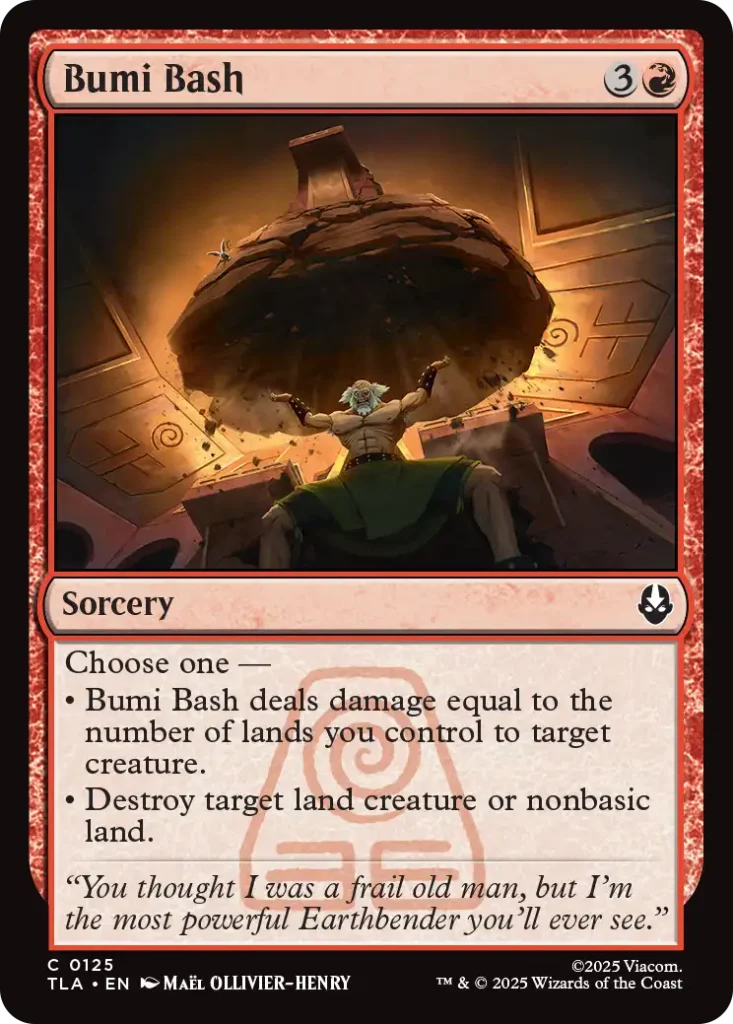
Bumi Bash is a four mana removal that scales as the game goes longer. You’ll usually be able to kill pretty much anything (except The Walls of Ba Sing Se). If you’re targeting a land creature with this spell, always choose the second mode. This way your opponent can’t surprise you with a pump spell.
Green
1. Rocky Rebuke
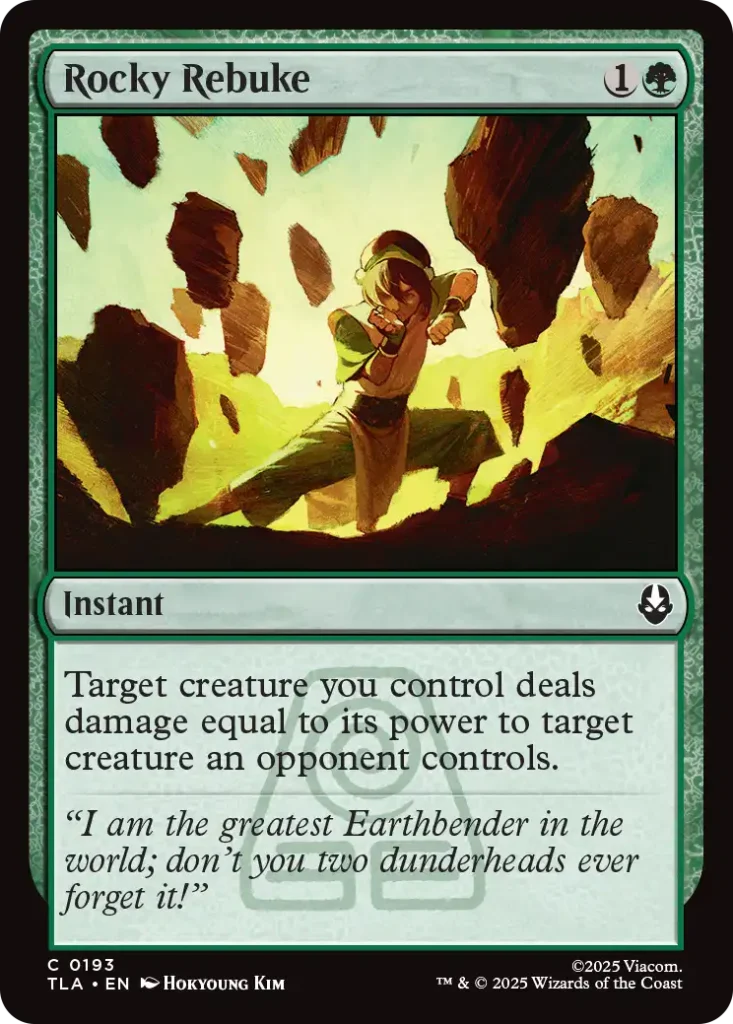
Cheap removal at instant speed, the only thing you need is a large creature and thankfully, there’s no shortage of them in green.
If possible, try to avoid casting it when your opponent has a bunch of mana available. You don’t want to get blown out by a well-timed removal.
2. Badgermole
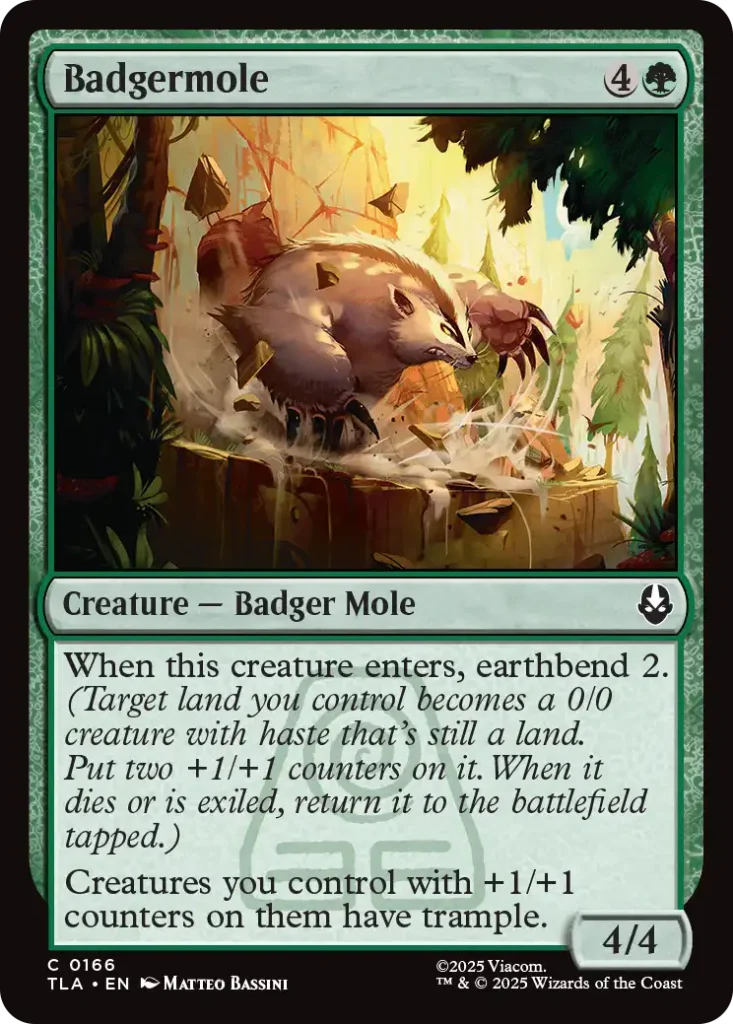
This is a perfect example of a large green creature. Even if your opponent manages to remove it, you’re still left with a 2/2 land.
As mentioned, getting two creatures from a single card is great. While, you aren’t getting Allies, you are still unlocking a relevant benefit. Your creatures with +1/+1 get trample.
Naturally, that includes earthbent lands, but there are also ways to put counters on your other creatures.
3. Raucous Audience

Raucous Audience allows you to cast your expensive spells (or cast multiple spells in a turn) ahead of schedule. You’ll be able to cast a 4-powered creature quickly, and then this adds even more mana.
On top of that it’s a 2/1 which is still a somewhat relevant board presence and can participate in a combat if needed.
Avatar Draft Archetypes
Below you’ll find the ten most common Avatar draft archetypes. For their names we used what should give you the best idea of what to expect, as opposed to the official names. (As some of them weren’t very telling, for example: earth rumble ramp)
Since not all cards were revealed yet, the descriptions are too detailed, but should still give you an idea of what each archetype is about.
Green-White: Go-Wide Allies
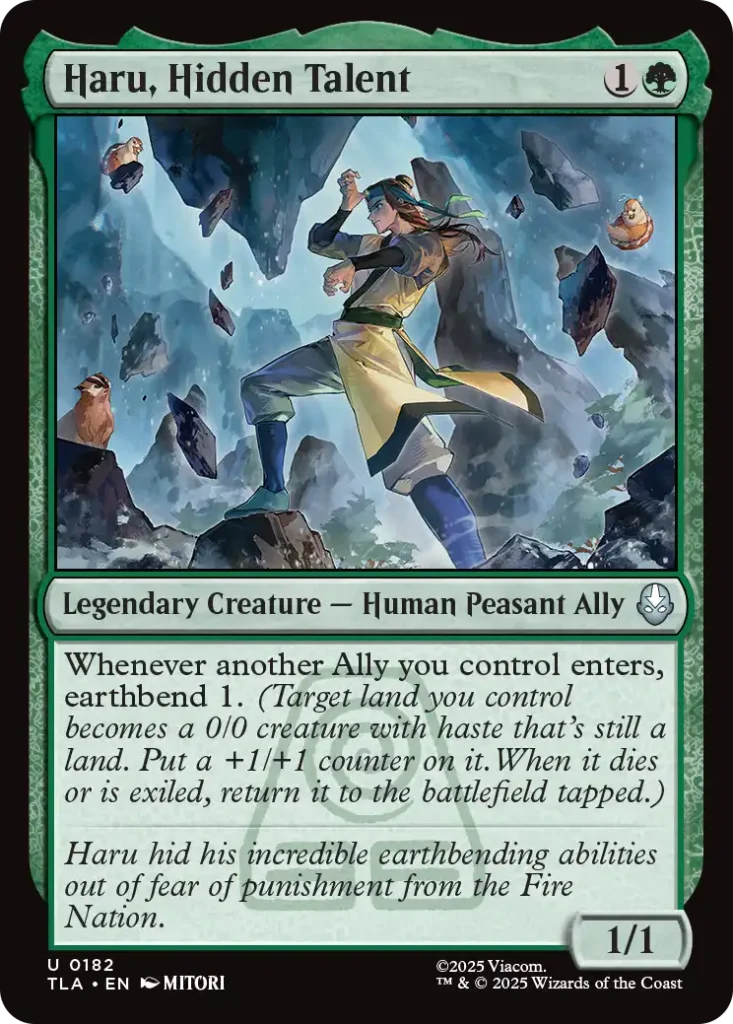

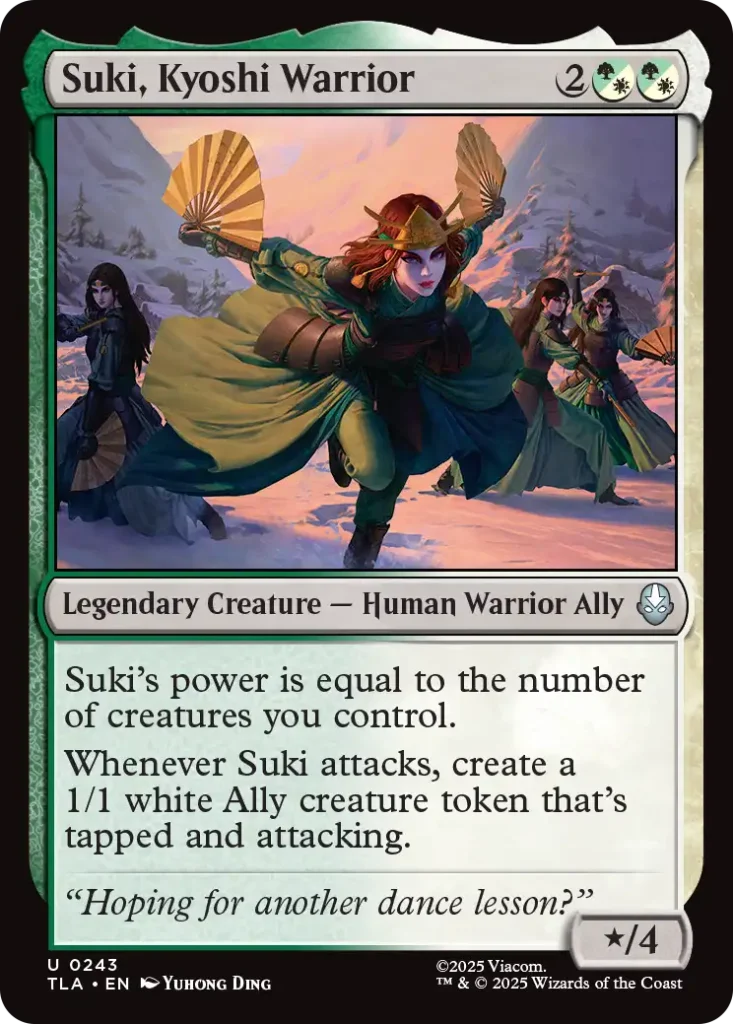
The goal with a go-wide theme is to put a lot of creatures in play, then use some kind of a mass pump effect to attack for the win. You can deploy this theme in pretty much any white deck in this format, but how exactly it plays out, depends on the color you pair it with.
With green, you unlock a lot of cards that care about the Ally creature type.
One Card, Multiple Creatures
The easiest way to control a bunch of creatures in play is by playing cards that generate multiple creatures. That’s why both Invasion Reinforcements and Kyoshi Warriors work great. Not only are you getting two creatures in play, they are both Allies!
Creatures that earthbend also work. Think cards like Badgermole, Haru, Hidden Talent, and The Boulder, Ready to Rumble.
Taking Advantage of Wide Board
So, you know you need to draft a bunch of cards that make multiple creatures. The good thing is that, most of them are pretty good on their own. However, you still want to push them over the top with additional synergies.
As far as mass buff effects go, you’ve got plenty of options.
White Lotus Reinforcements only works on Allies, but Earth Kingdom Soldier, Invasion Tactics, Team Avatar, and Water Tribe Captain work on everyone.
Furthermore, you’ll be able to use Suki, Kyoshi Warrior and Allies at Last to their full potential.
As usual, you round up the synergies with card that are simply good on their own, and the best removal spells. (If you don’t mange to draft enough of those, try to at least get some airbend cards.)
Red-White: Go-Wide Aggro
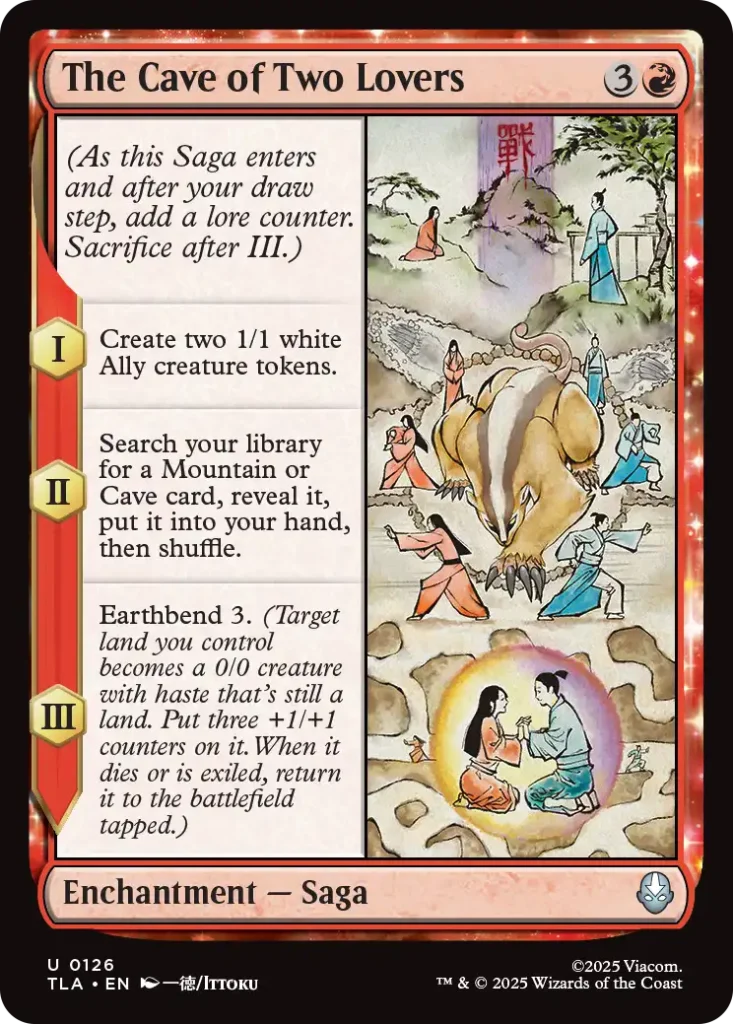
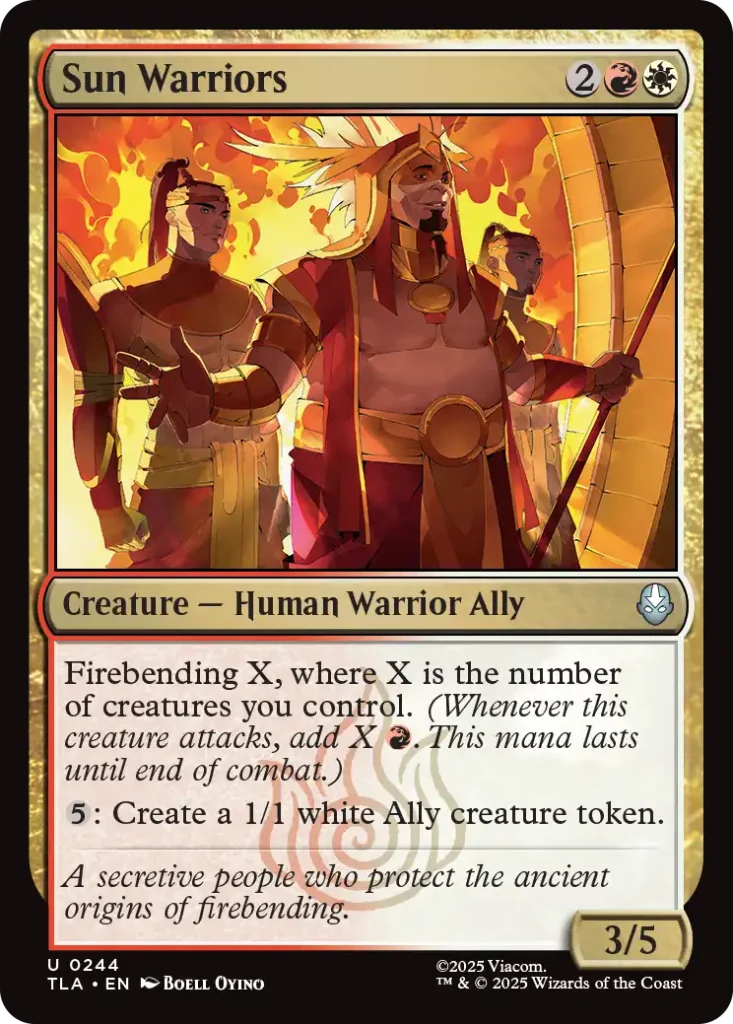

On the other hand, while red-wide is also go-wide, but even a bit more aggressive. This archetype will likely be quite successful, as its two bending mechanics play really well with one another. You can airbend your opponent’s best blocker out of the way, so your firebending creatures can attack safely.
Instead of having a strong focus on any of these mechanics, you’ll probably want a nice mix of both — after all, the main theme for this deck is still going-wide, as can be seen from the gold cards.
Sun Warriors will reward you for controlling lots of creatures by firebending for a bunch of mana. Plus, you can spend it to create even more creatures. Furthermore, it’s a flavor win that Jet, Freedom Fighter works best in a large group. Creatures with built-in removal are really powerful.
Then you’ve got cards like Water Tribe Captain. The card is fine in any white deck, but pairing it with firebending allows you to activate its ability easier.
Going Wide in Red
You’ve already learnt about the ways how to make multiple creatures in white, but red also brings some nice tools to the table. For example, The Cave of Two Lovers gives you a total of three creatures once the saga is complete.
Furthermore, there’s Treetop Freedom Fighters and Fire Nation Attacks, so going-wide should be relatively easy in this color pair.
Blue-White: Flyers Tempo
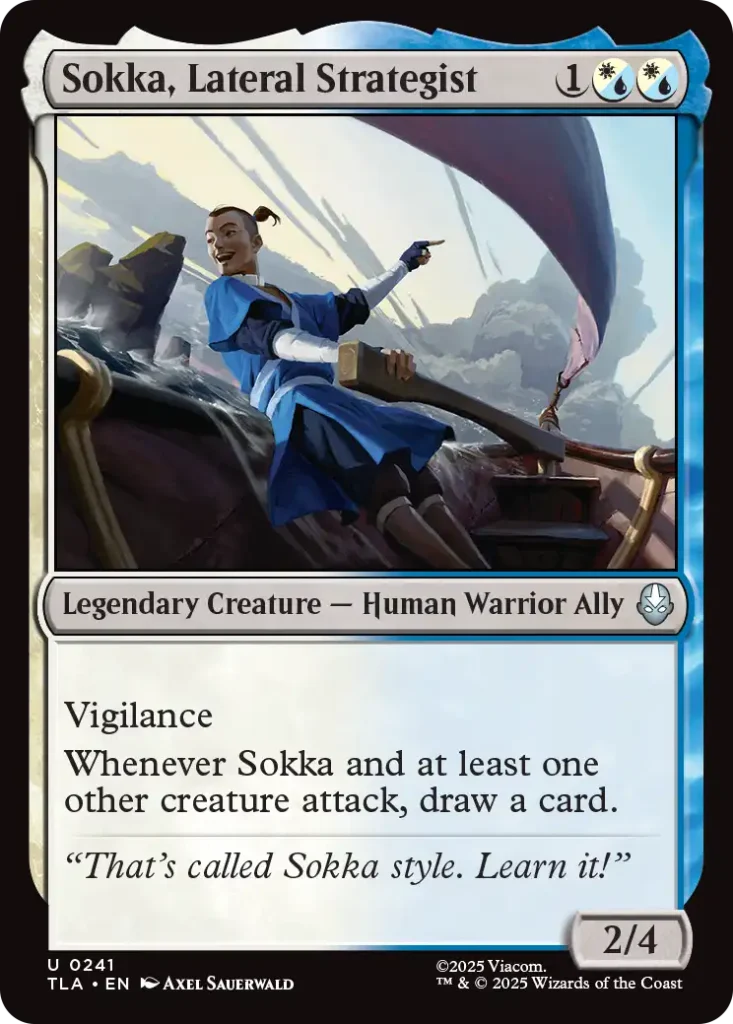

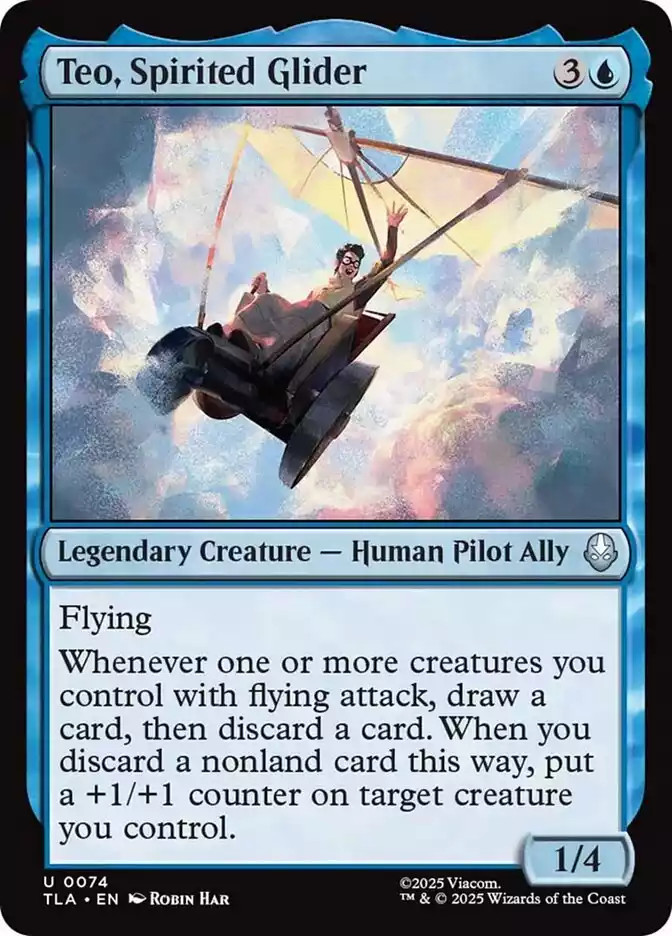
As usual, the majority of flying creatures are in white and blue. The deck plays out like a tempo deck, taking full advantage of the airbend mechanic.
What is a Tempo Deck?
A tempo deck wants to get ahead early by playing efficient threats, then maintain its advantage by using cheap disruption spells. You don’t care about card advantage that much, but more about getting ahead on board just long enough to win before the opponent could stabilize.
In Avatar draft, your efficient threats will be various creatures with flying (like Momo, Playful Pet, Iguana Parrot, and Teo, Spirited Glider).
As far as cheap disruption goes, Boomerang Basics and Invasion Submersible are both excellent options. As mentioned, anything that airbends also works. Whenever your opponent tries to stabilize with a large blocker, you’ll simply airbend it out of the way.
Some cards can even serve both roles — Aang, the Last Airbender and his Glider Staff for example. These are good on their own, and will especially shine in an archetype like this one.
Black-White: Sacrifice
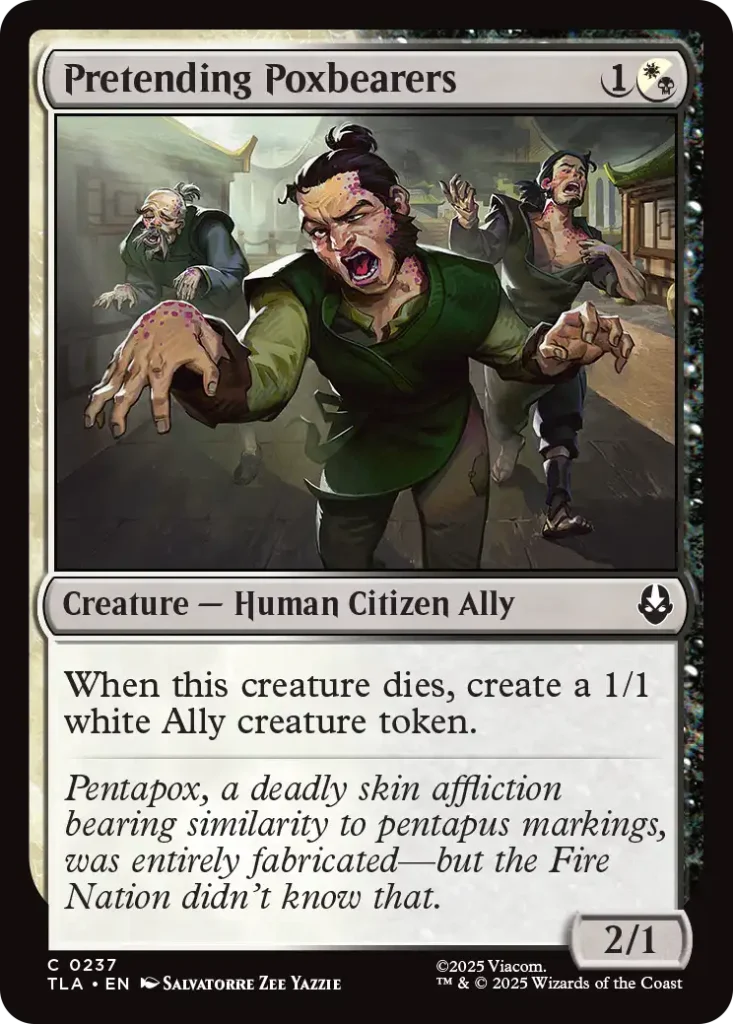
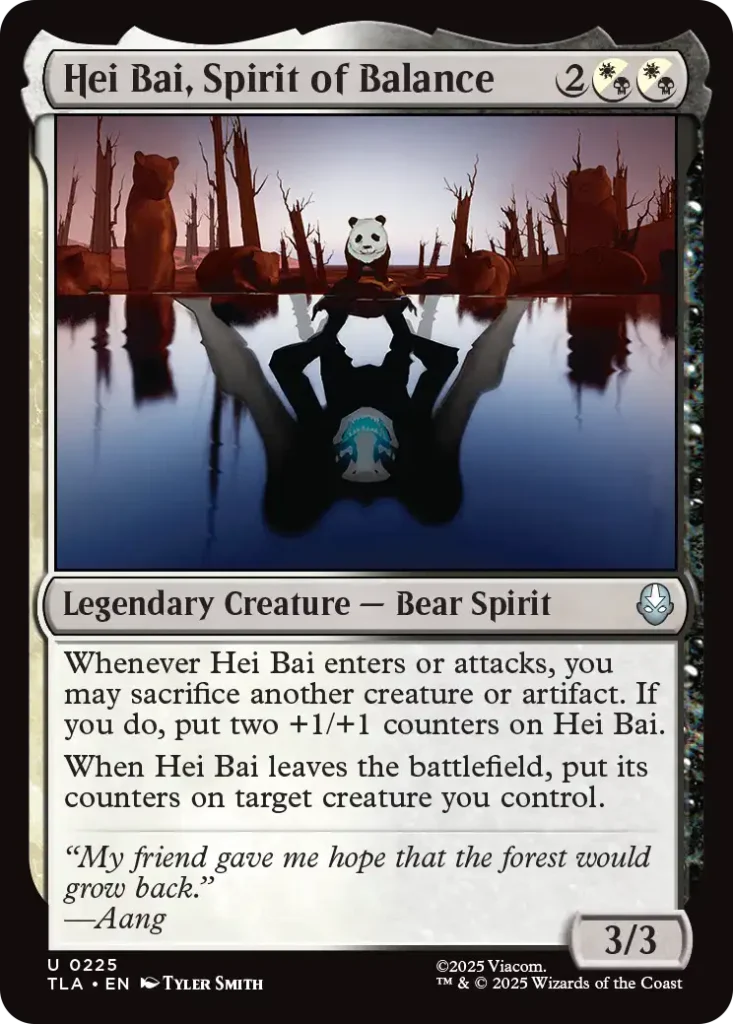
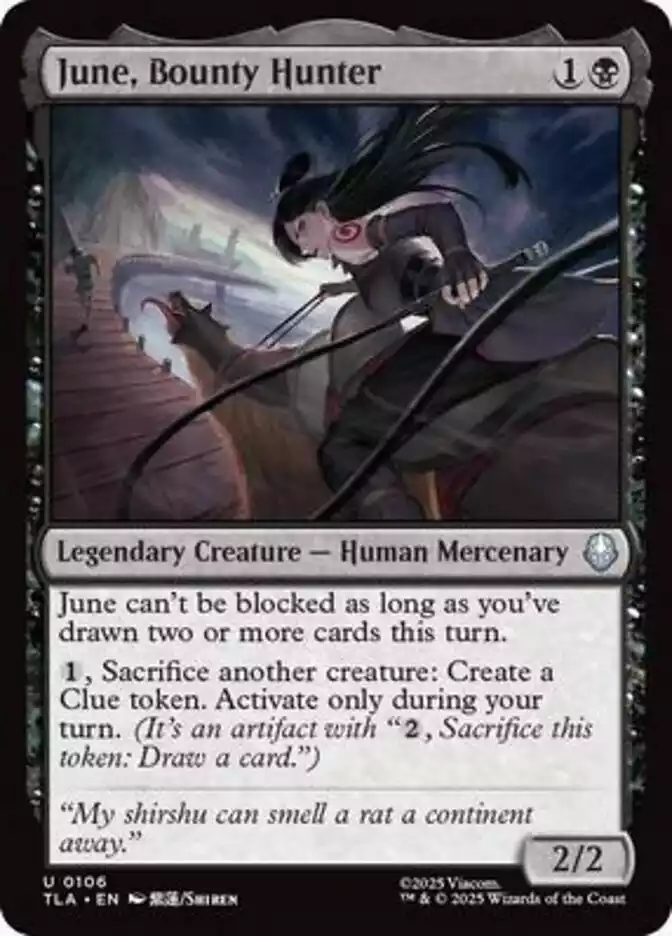
Sacrifice is a common theme in many draft environments. This time around you’ll be able to sacrifice either creatures or artifacts for various benefits. There are a few cards that make Clue tokens in this set, so you’ll be able to sac those in a pinch.
In order to really make a sacrifice deck tick, you need three types of cards: sacrifice outlets, payoffs, and fodder. Let’s explore each of those into more details.
Sacrifice Outlets
These are cards that allow you to sacrifice creatures (or other permanents). There are repeatable ones, such as June, Bounty Hunter, Hei Bai, Spirit of Balance, and Joo Dee, One of Many. With these in play, you’ll always have the option to sac something.
Nevertheless, even the one-time sac effects can be really powerful. This archetype will be able to take the most advantage out of Deadly Precision, making it an incredibly efficient removal spell.
Furthermore, both Hei Bai, Spirit of Balance and Buzzard-Wasp Colony reward you nicely for sacrificing stuff.
Additional Payoffs
Of course, outlets are already payoffs by themselves. However, there are even more cards that reward you for sacrificing.
A perfect example is Tolls of War, providing you with 1/1 Ally tokens. Note that its ability triggers only once per turn, so you might want to spread your sacrificing over multiple turns.
Zhao, Ruthless Admiral is kinda similar. As you can see, the sacrifice theme also leaks into red color. There’s another payoff there with Jet’s Brainwashing. With its help you can steal a creature then sacrifice it, provided you’ve got a sac outlet.
Fodder
Permanents that you don’t mind to sacrifice are commonly called sacrifice fodder.
These can be all sorts of things. Tokens such as Clue or Ally work nicely, so anything that makes them will do the trick.
The token from Fire Navy Trebuchet is also great, as it stick around until your end step — then you need to sacrifice it anyway, so no value lost if you do so beforehand.
Besides, there are a bunch of creatures that already did most of their jobs by entering or leaving play. (Think Callous Inspector, Corrupt Court Official, Momo, Playful Pet
.) Such cards are always a good option to sac.
So, make sure you’ve got a nice mix of all of these. You don’t want to draft a bunch of cards that sacrifice, but not enough fodder and vice versa. Pair them with good removal and cards that are simply strong on their own, and you should do fine.
Blue-Black: Draw Two Control
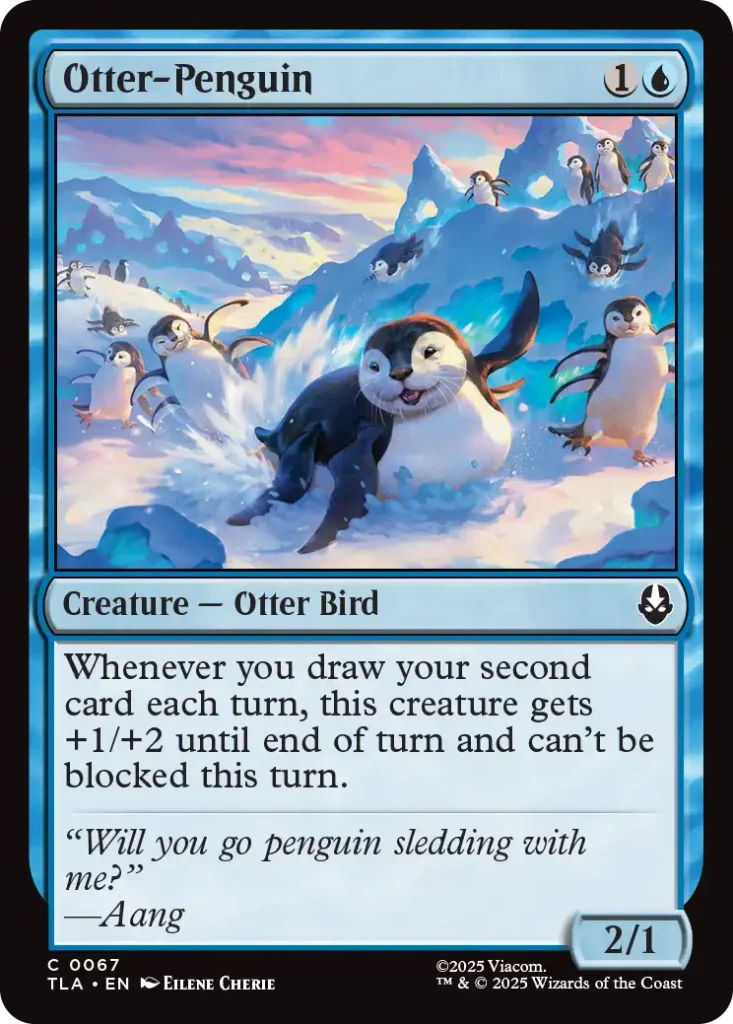

As usual, blue-black is a much more controlling color pair. There are cards that reward you for drawing two cards in a single turn. (This counts the one you draw for the turn. Meaning you only need to draw one more on your turn to get the triggers.)
Control the Game
However, don’t get too drawn into this whole shtick. Sure, there are useful rewards for doing so, and you’ll happily use them. However, you want to build a control deck first, with draw two synergies being secondary theme.
Why is that? Because when you’re planning to draw multiple cards, you want the game to go long. If you’re just drawing cards, without affecting the board, you’ll quickly fall behind. It doesn’t matter if you’ve drawn 5 more cards than your opponent, if you lose the game before you could use them.
Thus, you’ll want to start playing to the board early. Be it with cheap creatures that block well, or by efficient removal / disruption spells. You don’t mind trading 1-for-1 a bunch of times, since you’ll be able to pull ahead in the late game with your card advantage.
Some examples of useful early plays would be Watery Grasp, Forecasting Fortune Teller, and It’ll Quench Ya!. These can all be sued early and are still okay draws even later in the game.
Draw Two Synergies
With that said, here are the cards that work well with drawing two cards in a turn:
- Foggy Swamp Spirit Keeper has great stats, and can make tokens. An excellent gold card for this archetype.
- Messenger Hawk provides a Clue and can grow in power.
- Somewhat similar card is Knowledge Seeker, but probably even better as a useful turn 2 play.
- Otter-Penguin can also be used in a pinch, although it’s probably better suited in a more aggressive color pair.
- You can get Wolfbat back once. Useful, even if not the stongest.
- Foggy Swamp Hunters gets a couple of keywords, but is probably still a weak card.
Some of these are fairly whatever, which is another reason why you don’t want to go all-in on this theme. Just draft cards that are good on their own, and let these synergies happen almost incidentally.
Blue-Red: Lessons & Noncreature Spells
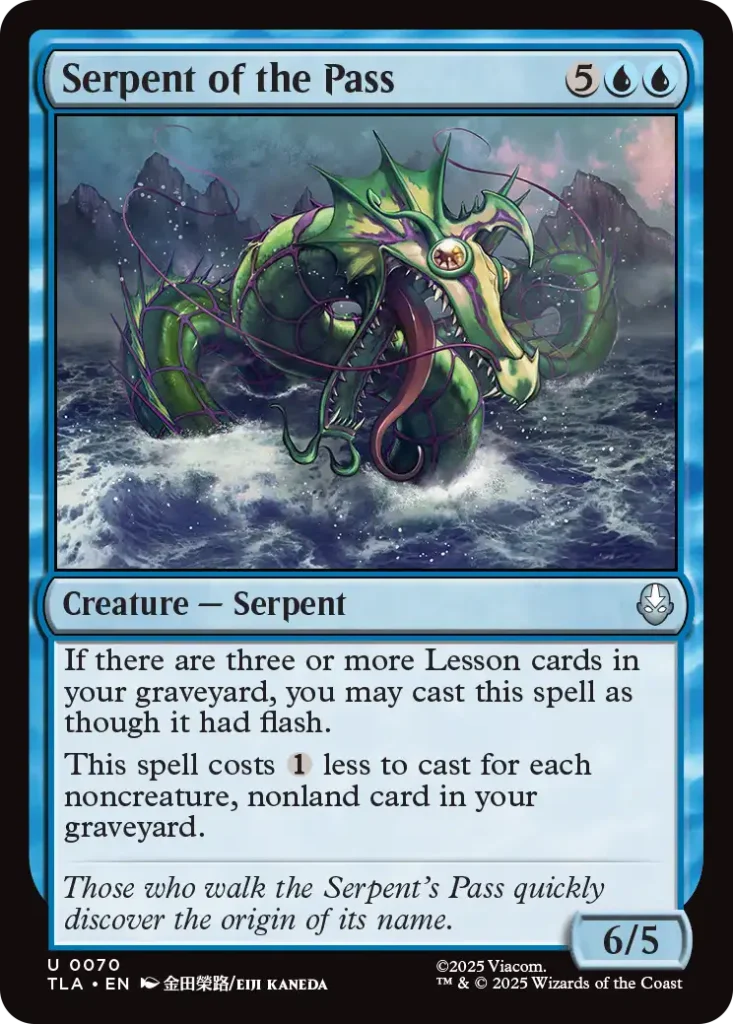
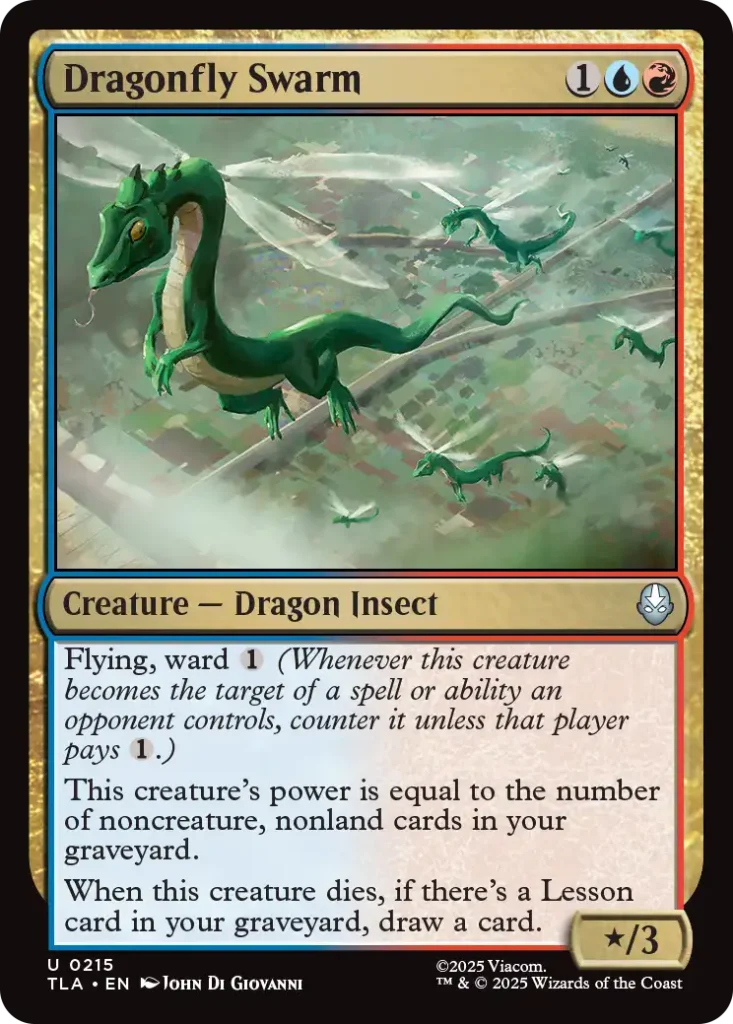
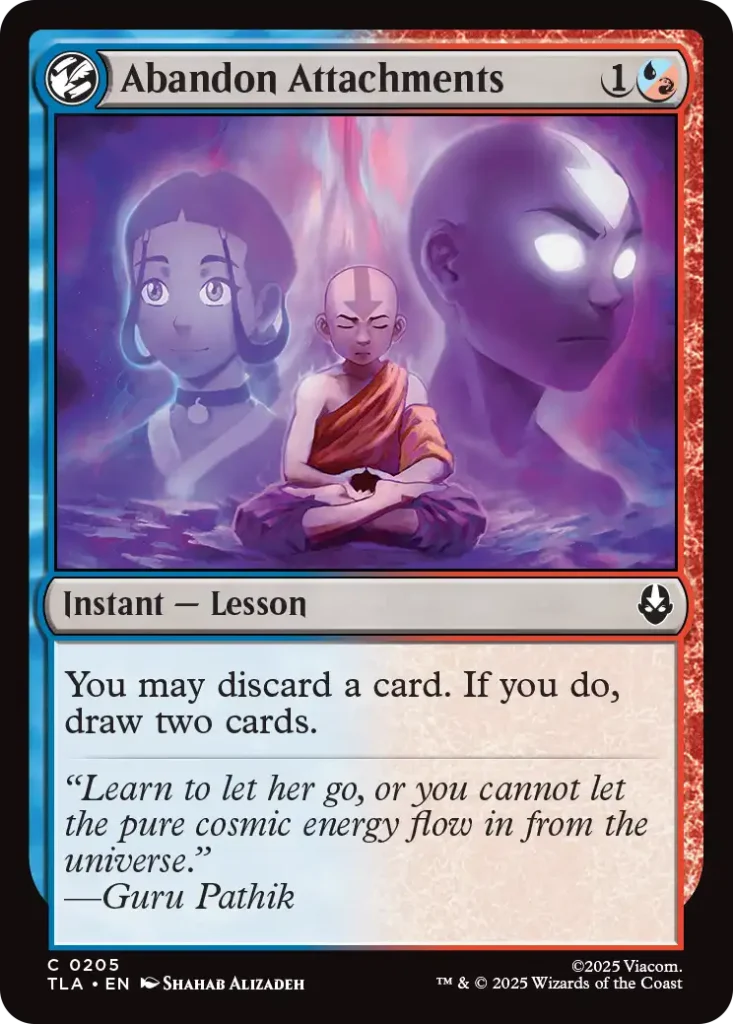
Blue-red once again cares about noncreature spells. This time around, there’s also a specific focus on the Lesson card type. The rewards for drafting Lessons work in different ways.
Lesson Rewards
Some (like First-Time Flyer) require just a single Lesson in your graveyard. You can assume, you’ll be able to consistently turn these on.
On the side are cards that want 3 or more Lessons in your grave. These will be significantly harder to support — so if you don’t like them without the full payoff, you probably shouldn’t include them in your deck.
For example Accumulate Wisdom is just Anticipate the vast majority of the time. (Plus, it’s a Lesson, which enables your other stuff.) If you’re happy with that effect, you should definitely play it. Occasionally, you’ll be able to draw three cards with it in the late game, which is insane value.
Somewhere in the middle are cards that scale with the number of Lessons in the graveyard. One such card is Combustion Technique. Useful on turn 2, but also improves as the game goes on.
Noncreature Spells
A few cards synergize with any noncreature spell — not just Lessons. Boar-q-pine will probably end up being to slow, but Dragonfly Swarm and Serpent of the Pass both seem solid, provided there’s enough good Lessons.
The majority of instants and sorceries in blue-red has the Lesson subtype tacked onto, which means there are a lot of Lessons. Thus, it shouldn’t be too hard to draft a critical mass of them. Ideally, you’d want at least six in a deck like this.
Now, this doesn’t mean that you play just any Lesson you can draft. If a card isn’t good enough on its own, don’t play it. Having payoffs, won’t suddenly make How to Start a Riot a good card in a deck with not that many creatures. Iroh’s Demonstration, on the other hand, will work in any red deck.
Blue-Green: Ramp & Lessons
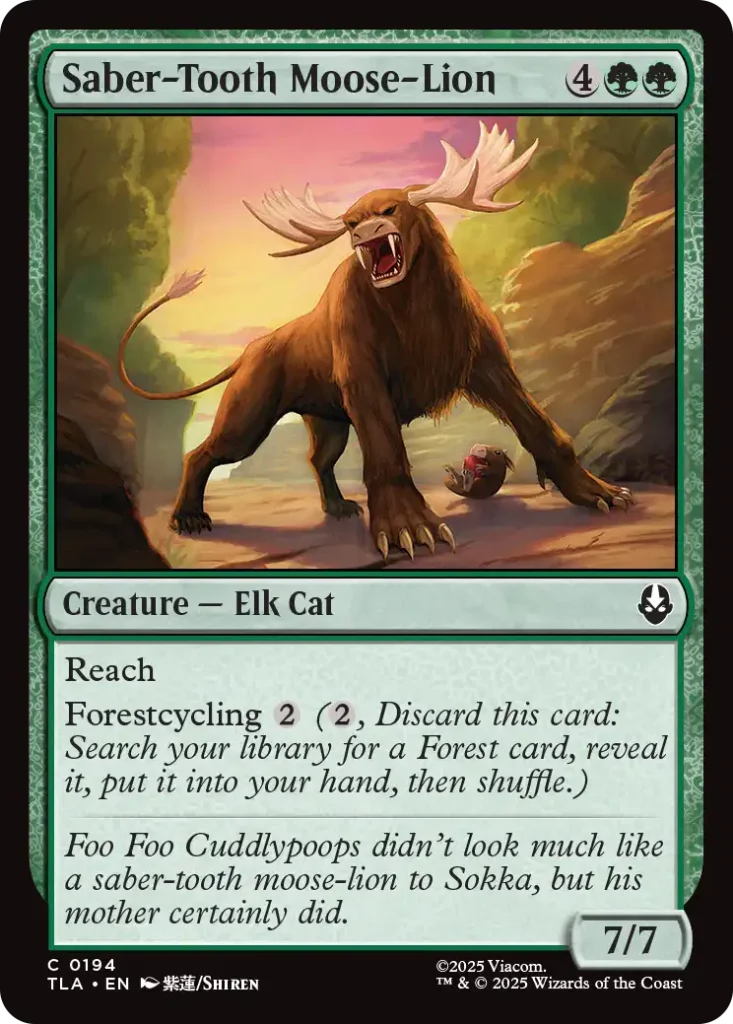
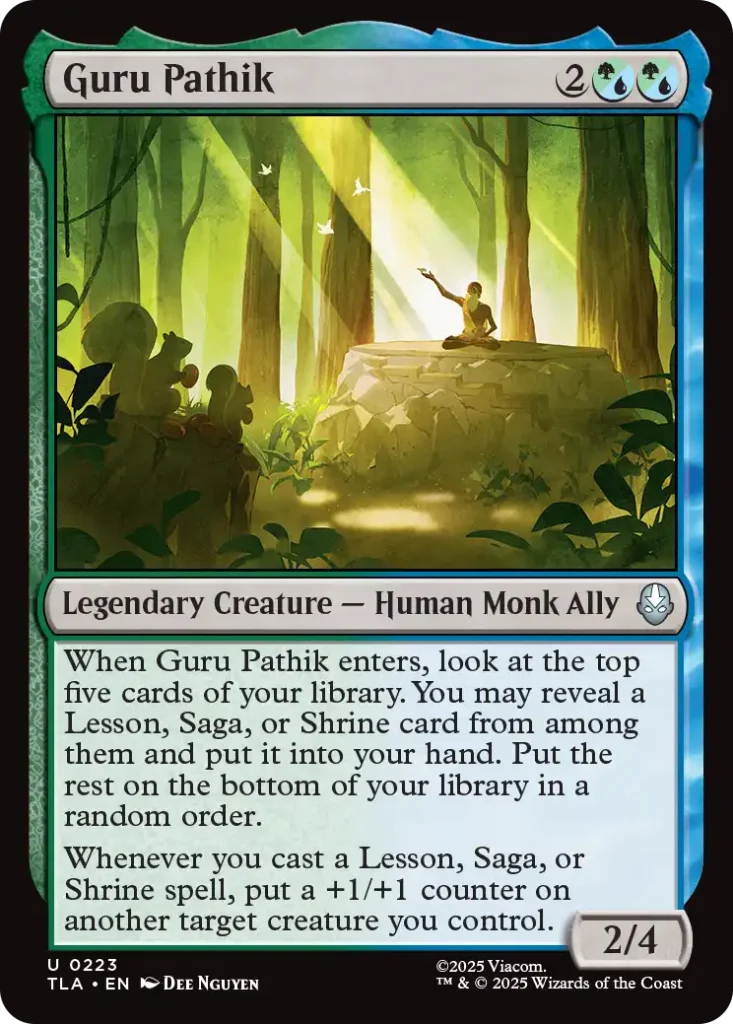

This archetype is similar in that it uses an old, common theme (ramp) and pairs it with various Lesson synergies.
Ramp Cards
So, what are the ramp cards you can use here? (For beginners: ramp refers to cards that can get you ahead in mana, either by putting more lands in play or being nonlands that create mana.)
- The gold uncommon, Hermitic Herbalist is obviously strong. Not only does it come with great stats for a two drop, it can make one or two mana — the latter can only be used on Lessons, but that’s perfectly fine.
- Raucous Audience is weaker, but much easier to acquire in the draft by being a common.
- Cycle of Renewal nets you an additional land. Plus, it’s a Lesson, which is neat.
- Shared Roots is similar, but even better, as it costs a mana less. That’s very important, as it allows you to cast four mana cards (or a couple of two drops) on turn three.
- Finally, there’s Unlucky Cabbage Merchant — an unusual way to ramp, but still useful.
What Are We Ramping Into?
When you ramp, you typically trade current on-board presence for later mana advantage. In order to make this worth it, your expensive plays need to be really powerful and impact the board.
Bumi, King of Three Trials works great in that role, particularly since you’ll also want to fill your deck with plenty Lesson cards. Furthermore, there’s Flopsie, Bumi’s Buddy (quite fitting flavor-wise), but even a common like Badgermole or Saber-Tooth Mouse-Lion can do in a pinch.
Of course, the best options would be powerful rares, such as The Legend of Kyoshi or Aang, at the Crossroads. The latter isn’t just blue-green, but that’s the beauty of this deck.
Since you’re searching for basics and putting them directly in play, it’s easy to splash as third color. If you’re drafting this archetype, and you open something as powerful as like Bumi, Unleashed, you should try and play it in your deck. (Provided you’ve got enough mana fixing.)
Black-Red: Firebending Aggro

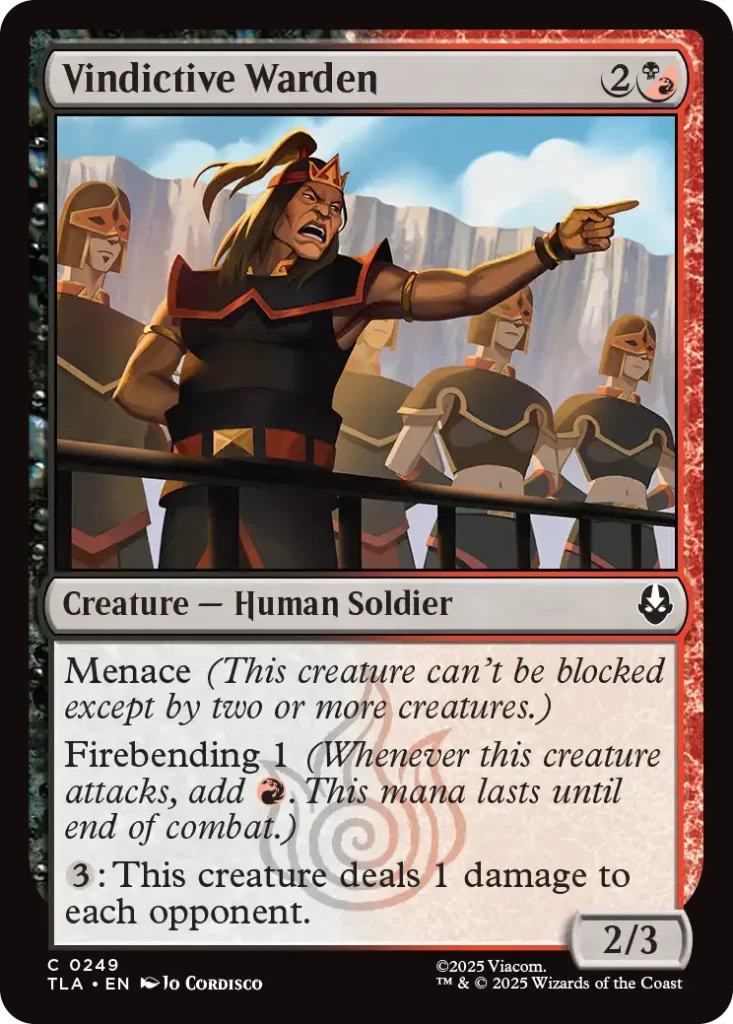

Black-red is centered around the firebending mechanic. Thus, it shouldn’t be a big surprise that this archetype wants to be aggressive. (After all, the mechanic does nothing when you aren’t attacking.)
There is no shortage of creatures with firebending, but which would be the best ones? Some of the stronger non-rares seem to be:
- Fire Nation Cadets is the cheapest option, provided you can get a Lesson in your graveyard.
- The other option to get the ball rolling quickly is with Fire Sages, a solid two drop, that discourages opponent from blocking it.
- Tundra Tank is an unusual vehicle, but it enables a safe firebending attack, while being a solid attacker itself.
- The jury is still out on Azula, On the Hunt. If you’re able to attack with it, you’re really happy with the card. However, if your opponent manages to remove it before that with a cheap spell, it’s going to be a massive tempo swing in their favor.
- Similar goes for Zuko, Exiled Prince — sure it’s a great card when it can attack, but your opponent airbending it will be really bad for you.
Firebending Payoffs
As mentioned in the Mechanics section, most firebending creatures give you a way to spend this mana, but you can also use it to activate other abilities (like sacrificing a Clue) or to cast instants.
There are plenty of good instants available with cards like Fire Nation Attacks, Sold Out, and Zuko’s Conviction. The latter is quite surprising as this effect is typically used on a sorcery. (Don’t forget that you could also use it on your opponent’s turn to surprise-block an attacker. Sure, you won’t be able to use firebending mana on it in that case, but you’re still getting a major advantage.)
Combat tricks, such as Cunning Maneuver will also come in handy. Not only do you get to spend your firebending mana on them, they can also keep your creatures alive. (And your opponent is likely to block your firebender.)
As usual, the best payoffs come from higher rarity cards. For example, if you manage to open Ozai, the Phoenix King your deck will unlock a whole new dimension.
Finally, don’t forget that this is an aggressive deck first. You shouldn’t just jam every firebending creature in your deck, if it makes your mana curve bad. Instead, aim for a lot of two drops, so you can start attacking fast and put your opponent on the back foot from the get-go.
Black-Green: +1/+1 Counters & Earthbend

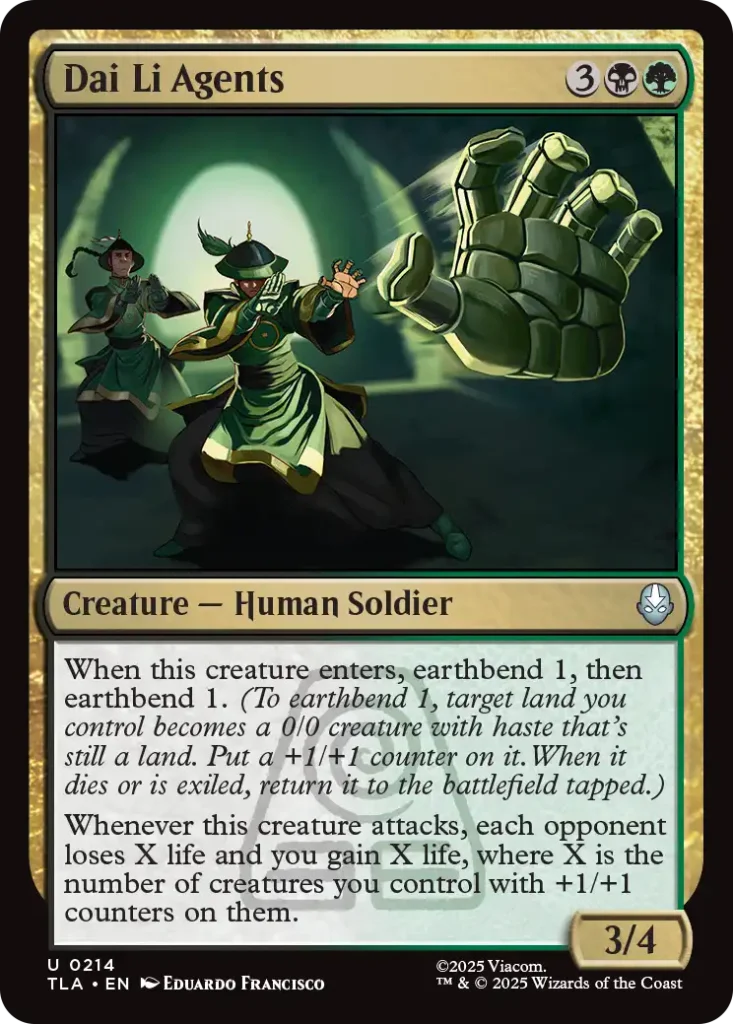
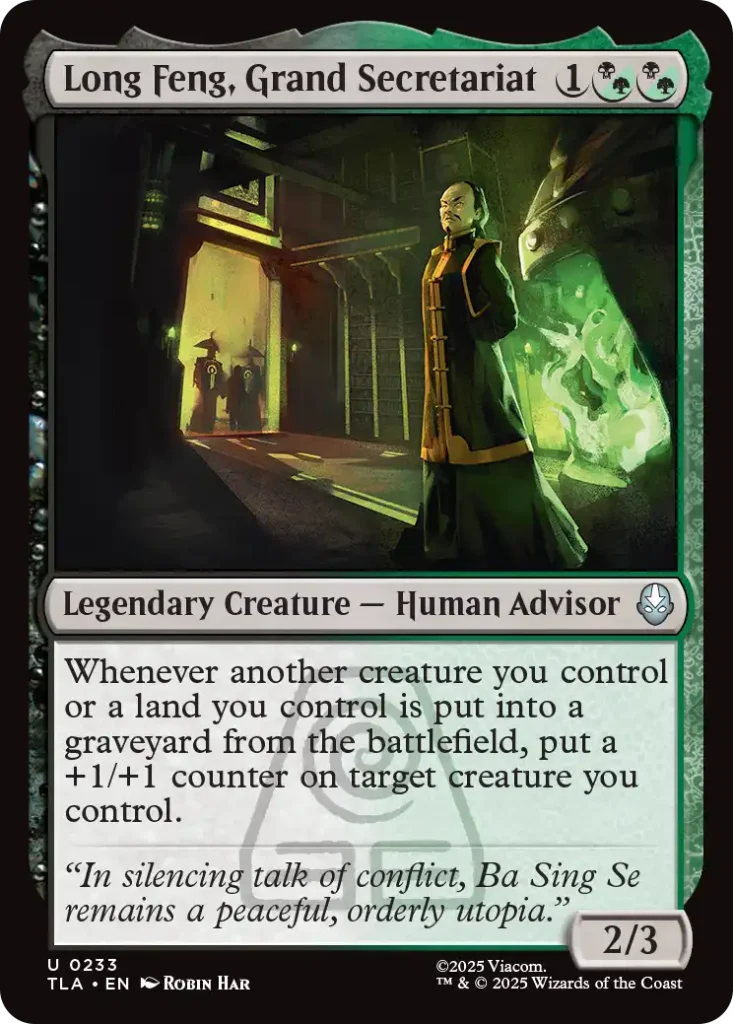
Another common theme that makes a return are the +1/+1 counters. In Avatar draft, you won’t need to try very hard to enable it, because of the earthbend mechanic. Whenever you earthbend, you end up with a land creature with +1/+1 counters.
Minor Benefits on Solid Cards
Furthermore, the benefits for controlling creatures with lots of counters are useful, but not game-breaking. Following cards showcase that nicely:
- Dai Li Agents is probably the best of the bunch. You get up to three creatures from a single card, and then you get to drain your opponent on attacks.
- Earth Kingdom General is also amazing. It’s a solid card on it’s own, but can gain you even more life as the game progresses.
- You can make a creature harder to block with Hog-Monkey.
- Buzzard-Wasp Colony can “wear” counters from other creatures.
- Toph, the Blind Bandit‘s power increases.
- Badgermole grants trample and earthbends.
All of these cards are at least playable, if not actively good. However, they don’t improve massively if you’ve got additional ways to put counters on creatures.
Therefore, don’t just draft cards that say +1/+1 counters on them when drafting black-green. Instead, you should pick the best card on raw power level. (While still paying attention to your mana curve, of course.) If you do so, you’ll inevitably end up with a solid deck with some counters synergies.
Red-Green: Midrange
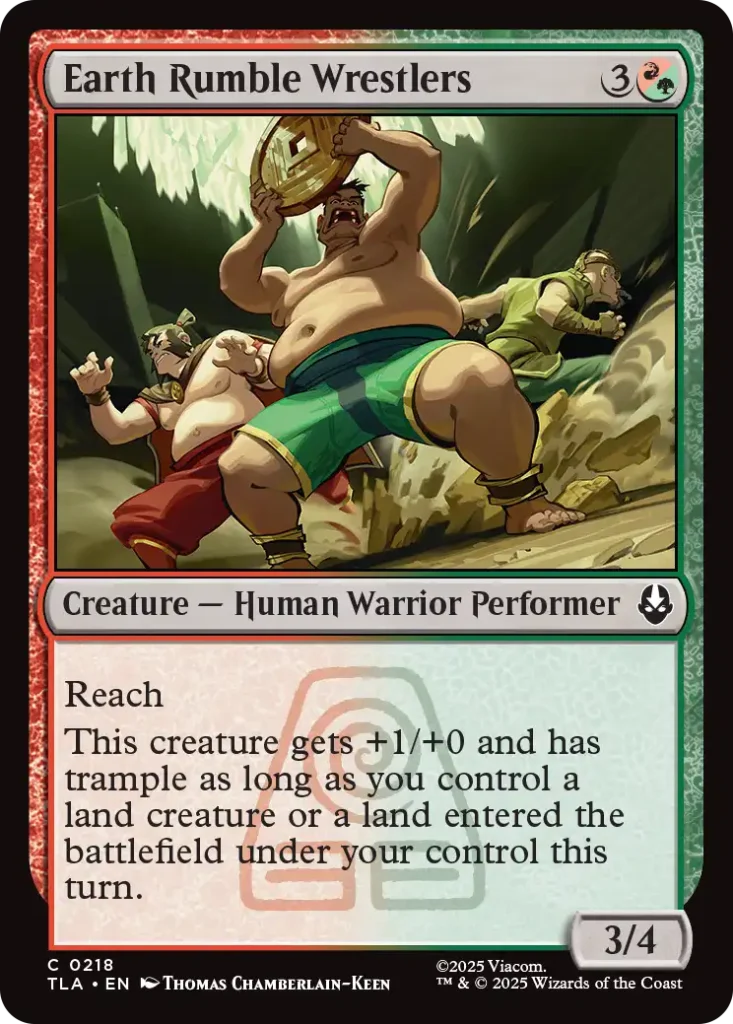
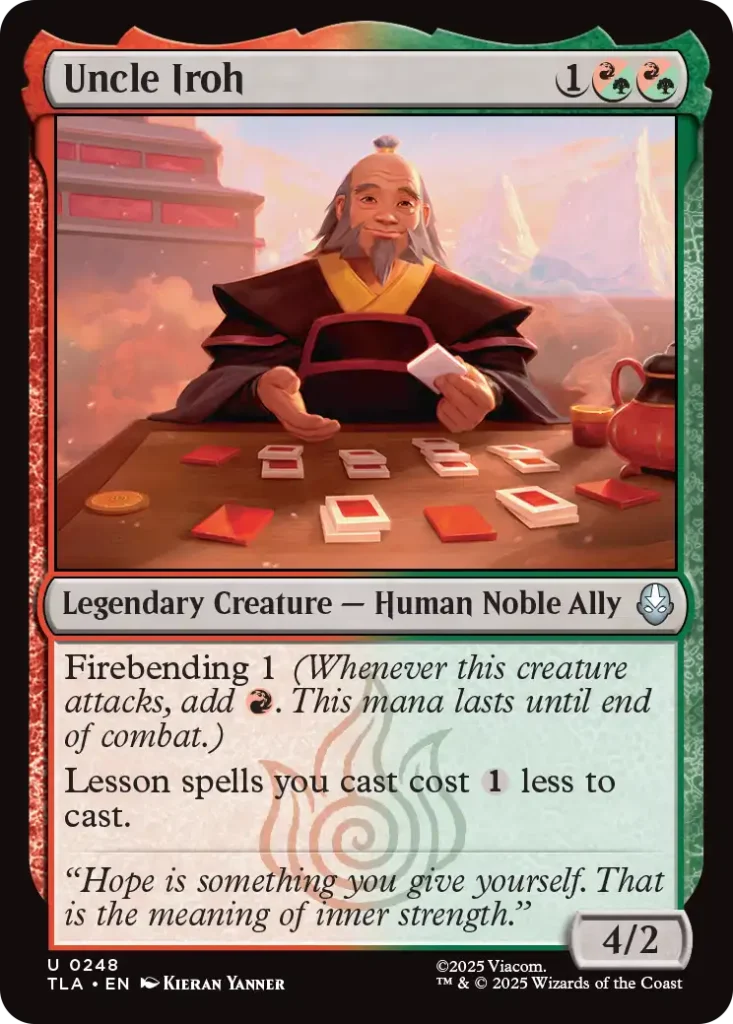

Finally, there’s red-green which doesn’t seem that focused. You could draft it by leaning into different directions. There are some earthbending and some firebending synergies. Furthermore, some cards care about creature with 4+ power.
While the synergies seem all over the place, that doesn’t mean the archetype is bad. There are plenty of good red and green cards that can create a strong deck.
Furthermore, the gold cards all seem useful, depending on which way you build your deck.
- Bitter Work can draw you a lot of cards during a long game, plus it makes a creature itself.
- Earth Rumble Wrestlers can further enable this 4-power matters archetype.
- Uncle Iroh firebends and makes Lessons cheaper.
Most often you’ll end up in this deck when you’re getting passed strong red and green cards in your first pack. Of course, opening a powerful rare, such as Bumi, Unleashed or Toph, Hardheaded Teacher could also put you on a red-green road.
Mono Color
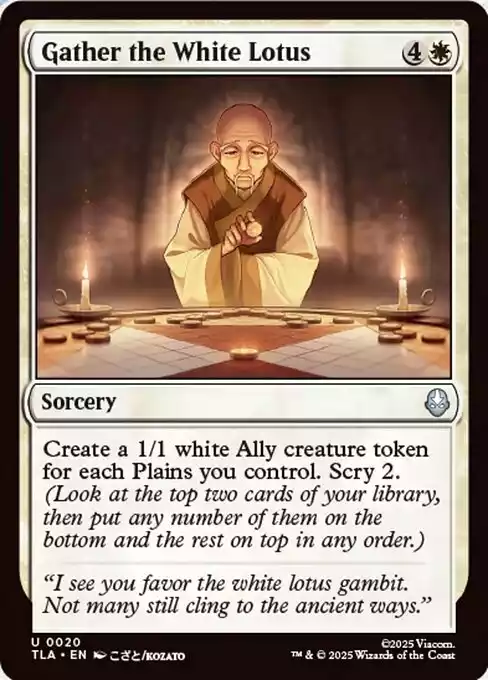
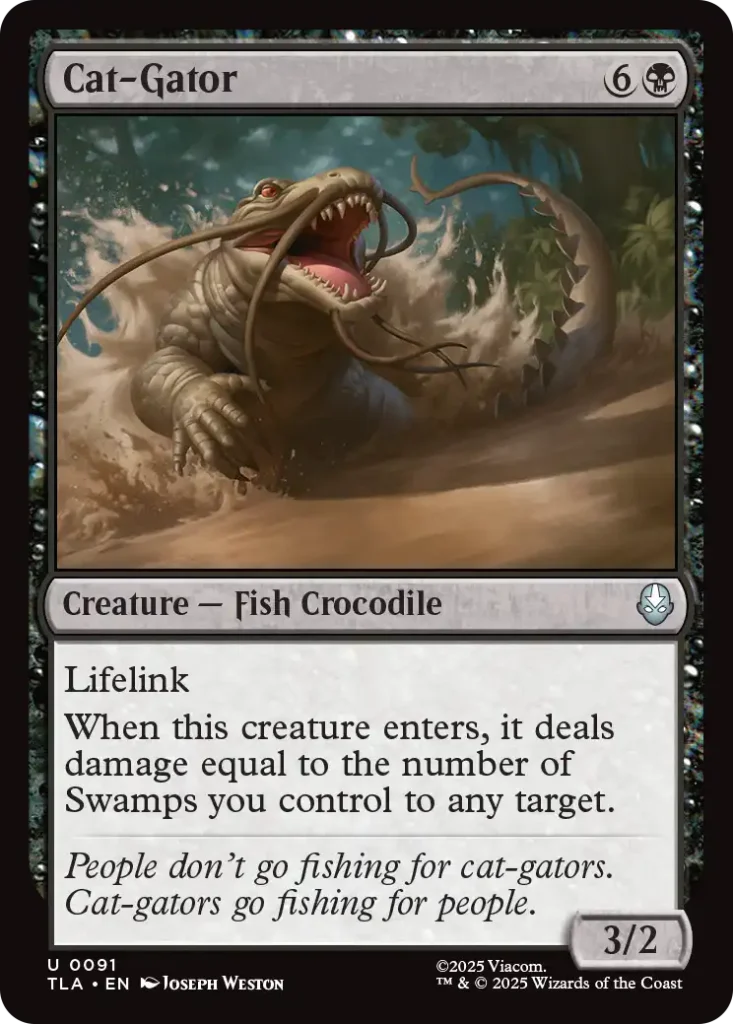
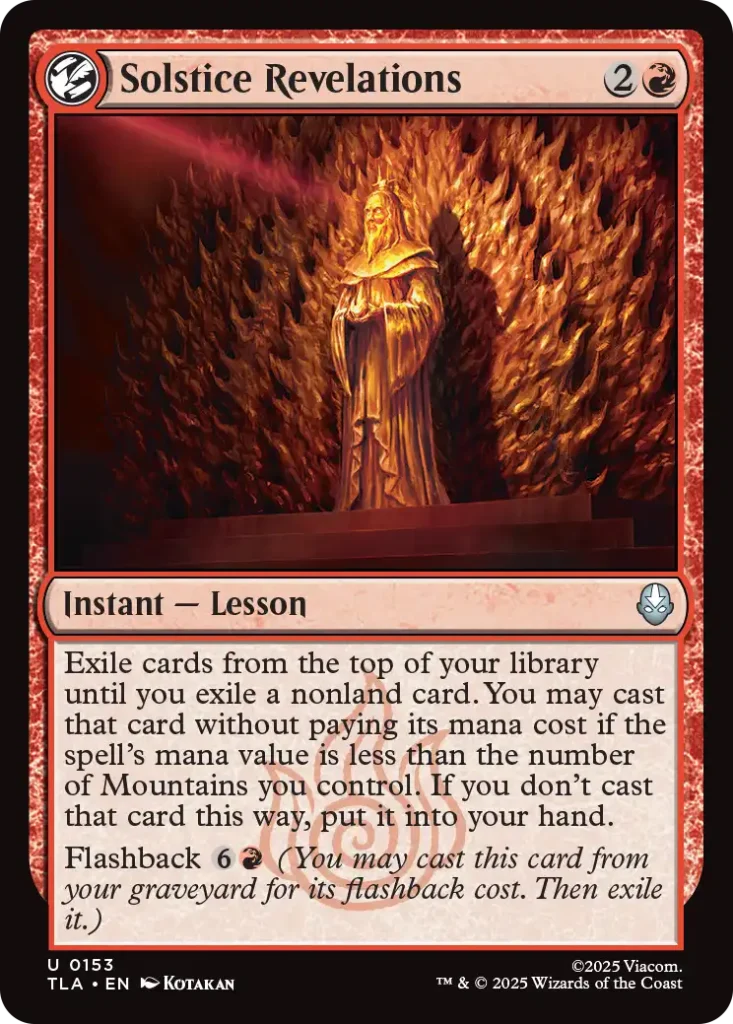
Besides the ten archetypes, there’s also some support for drafting mono colored decks. (Or mono colored with a splash.)
Each color gets one card that cares about how many of its lands you control:
- White: Gather the White Lotus can create 5+ Ally creatures.
- Blue: not revealed yet.
- Black: Cat-Gator will deal 7+ damage to any target (even to your opponent). It also gains you a bunch of life thanks to lifelink.
- Red: Solstice Revelations can “draw” you a card and potentially cast it for free. Plus you can use it twice.
- Green: Rockalanche can create a very large creature in mid to late game. The flashback makes it really strong.
The blue one is yet to be previewed, but white, black, and green cards look incredibly powerful, and could certainly be reasons to plant your flag and draft around them. While these will be at their best in a mono-colored deck, you can also splash a few powerful cards from another color too.
For example, you could play a deck using mostly white cards, and just three of the best expensive blue or blue-white cards. Such a deck could get away with a mana base consisting of 13 Plains and 4 Islands.
This would make Gather the White Lotus still powerful enough, typically giving you at least 4 creatures, but possibly even more.
Pakku Lesson Mill
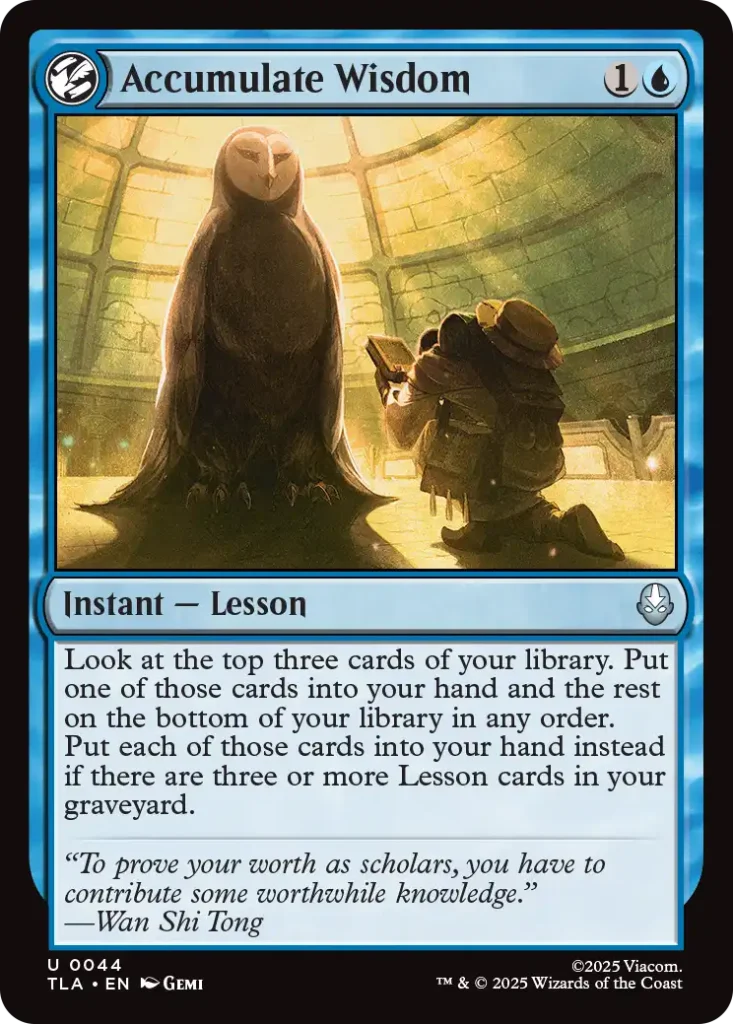

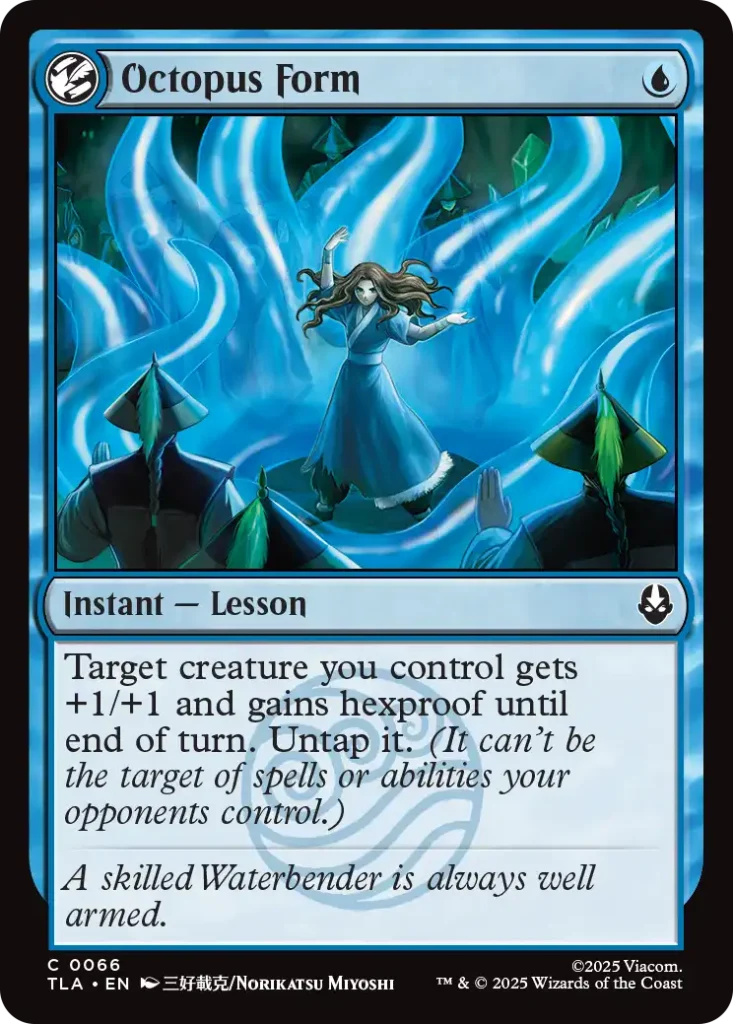
A pretty unique archetype can be built around Master Pakku. The basic idea is to get a lot of Lessons into your graveyard, and then mill your opponent. (You win when they try to draw a card from an empty library.)
So, what are some key cards for this deck? Well, you’ll obviously need at least a single copy of Pakku, although you’d prefer a couple to make it less likely to draw one. (Or if one gets removed.)
Octopus Form and It’ll Quench Ya! are both excellent ways to protect it. Plus, they are Lessons, which you’ll want to draft a lot of to support Pakku.
By doing so, you’ll also enable Accumulate Wisdom another reward for the deck. Drawing three cards for just a couple of mana is insane deal. Furthermore, pretty much all other blue common Lessons are at least playable too.
As you can see, this whole package consists of blue cards. This allows you to pair it with any other color you want. White might be the best of the bunch, giving you some great Lessons, such as Airbender’s Reversal and Airbending Lesson. Another great card is Glider Staff, a nice tempo play that enables safer Pakku attacks.
Speaking of which, one other crucial peace is a way to tap Pakku when it can’t attack. You can do so by using various waterbending effects, such as the ability of Katara, Bending Prodigy.
This deck is a bit slower and controlling, but can sometimes play out like a tempo deck, when you draw a more aggressive hand. (That can happen particularly when you’re blue-white.) You can still win by just dealing regular damage and controlling the board.
The deck is a real deal, especially compared to this next one.
5-Color Shrines

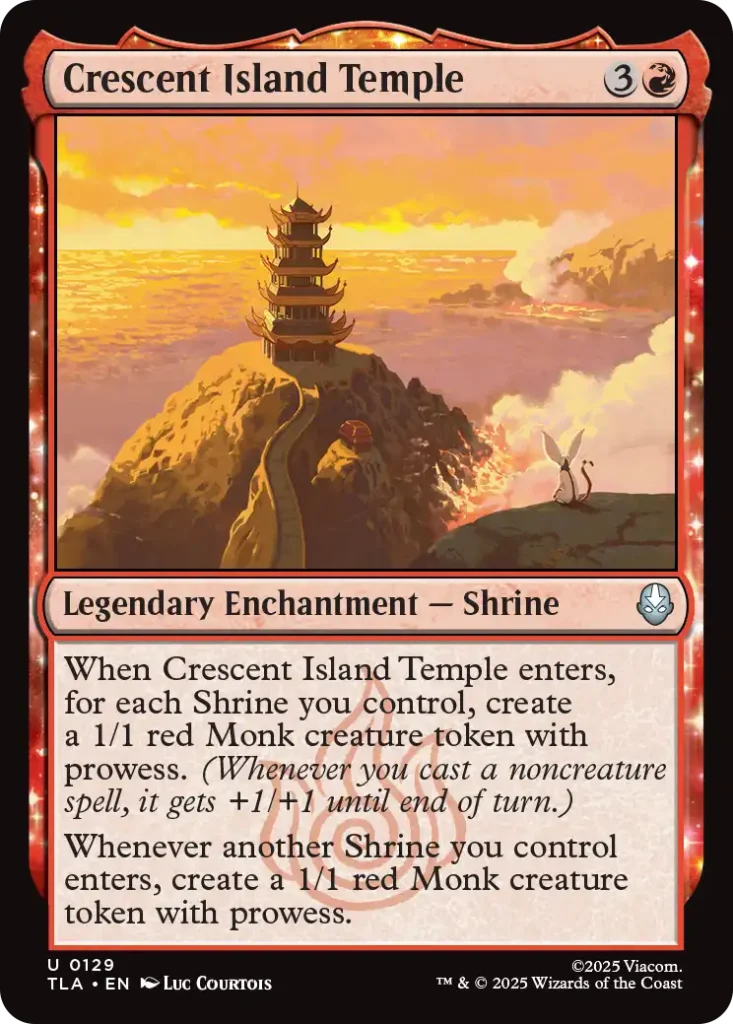

Last, there’s another special archetype, focused on an enchantment subtype — Shrines. There will be five different ones, one per color, as well as Aang,’s Journey that can help you fix your mana and find Shrines.
All Shrines work kinda similar. They improve with more Shrines you control, and reward you for playing additional ones. However, they are legendary, which means you won’t benefit much from playing multiple copies of the same Shrine.
That’s why you probably want to play all five colors, which gives you access to all Shrines, enabling their full power:
- Southern Air Temple can grow your team massively.
- The Spirit Oasis provides card advantage.
- Northern Air Temple drains your opponent.
- Crescent Island Temple creates bunch of Monks.
- Kyoshi Island Plaza is another way to fix your mana and potentially even thin your deck of lands.
However, the deck rarely comes together, as the overall power level of the Shrines isn’t high enough. Still, it can be a fun challenge trying to build a deck around them regardless. Just don’t try to do it if you’re running short on Gems and you really want to win.
Additional Tips for Avatar Draft
In this section you’ll find some extra tips that should help you with your Avatar drafts. More tips will be added in the next couple of days.
Counterspells
Knowing which counterspells are (and aren’t) in the format can help you to play around them. In Avatar draft, you’ll encounter just a couple.
One is It’ll Quench Ya!, which we already talked about. How and when should you play around it when playing against blue? In the first couple of turns, you should probably just play your cards on curve, even if your opponent has mana open. (Maybe just play the worst three drop first.) If they get you, they get you — you’re still trading 1-for-1.
It’s different when casting your best cards. Consider if you can afford to wait until you’ve got two extra mana. If you can’t or if your card will get significantly worse in a couple of turns, just play it out, and hope your opponent doesn’t have it.
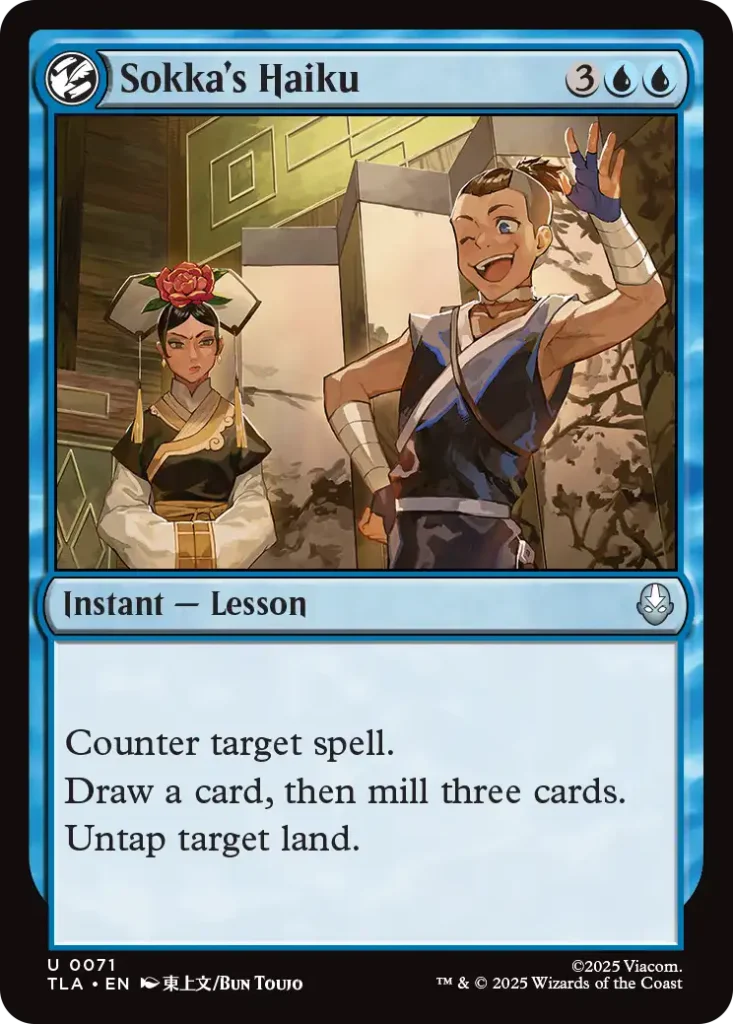
The other card is Sokka’s Haiku. If your opponent passes the turn with five mana open and multiple cards in hand, you should definitely keep it in mind. You don’t want to play your best card — instead you could bait them with a worse one, or simply pass the turn. (Particularly if you can do something else with your mana on opponent’s turn.) So, remember:
Five mana untapped,
they hold up the counterspell —
don’t cast your bomb yet.
You could also technically count Aang, Swift Savior, but that one is a rare and simply airbends the spell, so you probably don’t need to play around it.
Wraths
Another group of cards that you might want to play around are wraths. (Effects that destroy all creatures.) There’s just one classic wrath in The Rise of Sozin, which is an incredibly powerful mythic.
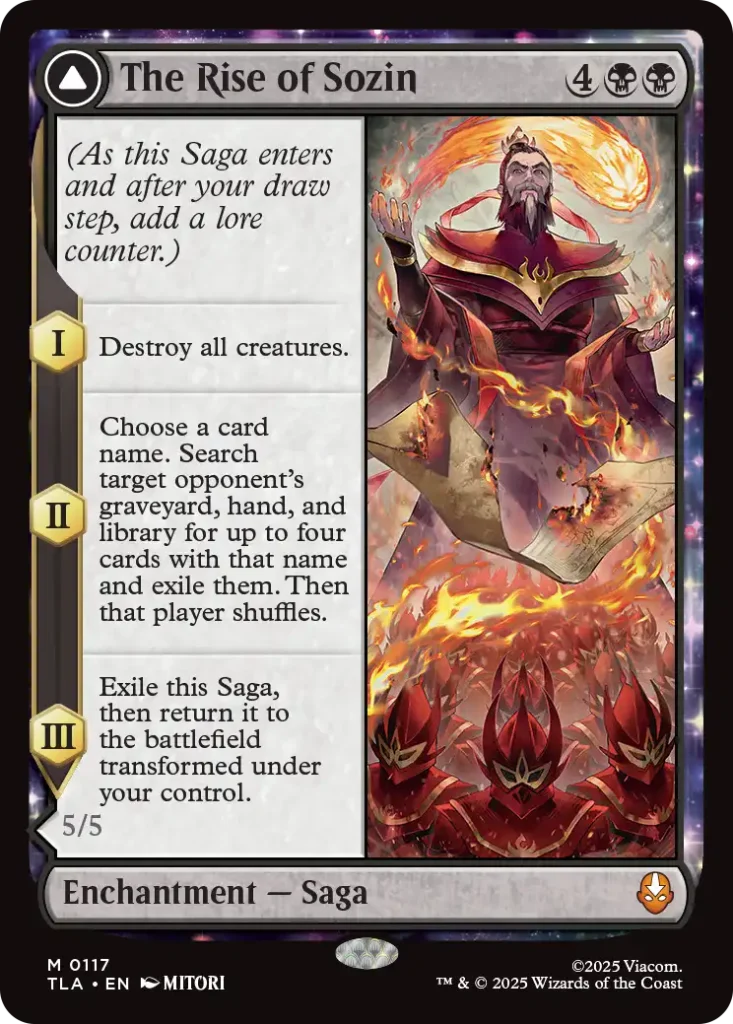
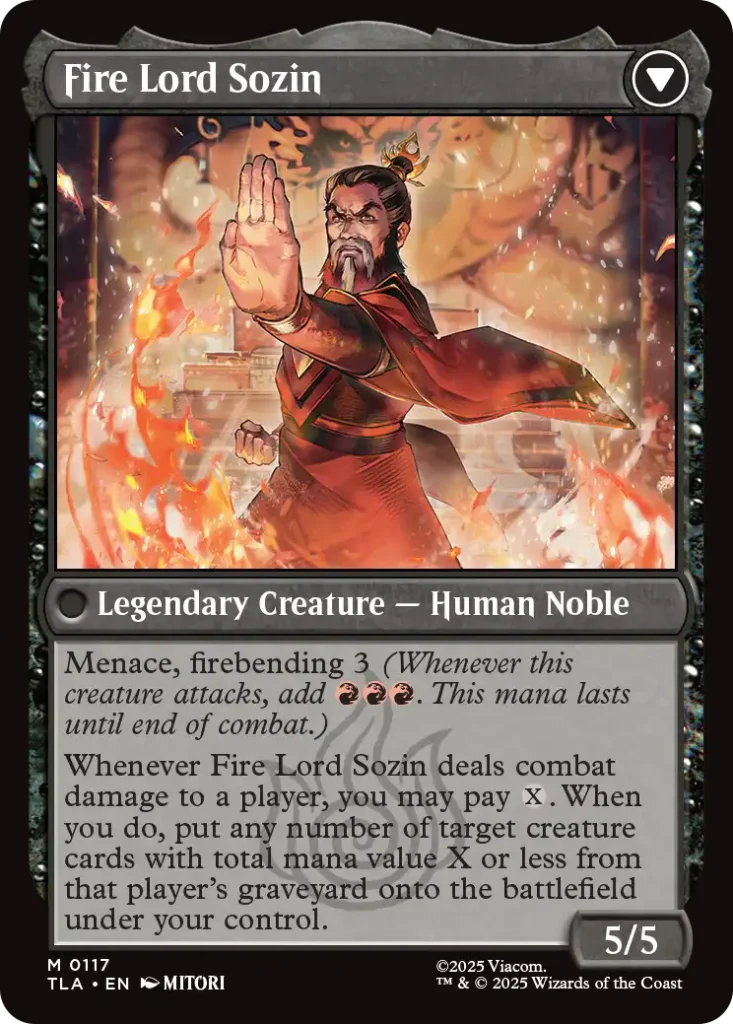
Usually the way to play around wraths is to hold a creature or two in your hand — but only while you’re ahead on the board. (Otherwise, your opponent doesn’t even have to cast a wrath.) This way you might be able to rebuild after a wrath.
Against Rise of Sozin, that might somewhat work, but your opponent is still getting a powerful 5/5 in a couple of turns, so it’s going to be an uphill battle.
Also, there are plenty of other wrath-like effects across different rarities with various effects. Some of these will be easier to play around:
- Day of Black Sun scales as the game goes long. Some high-mana creatures can survive if its caster doesn’t control enough lands.
- Destined Confrontation is perhaps the easiest to play around — just don’t overcommit to the board when it’s not necessary.
- Avatar’s Wrath is absurdly good. You are eventually able to recast your creatures for two mana each. (If your opponent doesn’t already win before that, which is a likely scenario.) Perhaps you want to hold a single creature that might be able to hold the fort down for a turn.
- Smaller creatures get removed with Ruinous Waterbending. However, the card seems fairly situational, so it probably won’t see that much play.
- Not really a wrath, but Crashing Wave might be miserable to play against in the right scenario. Not really much you can do against it, but try to keep your life total relatively high.
Lands
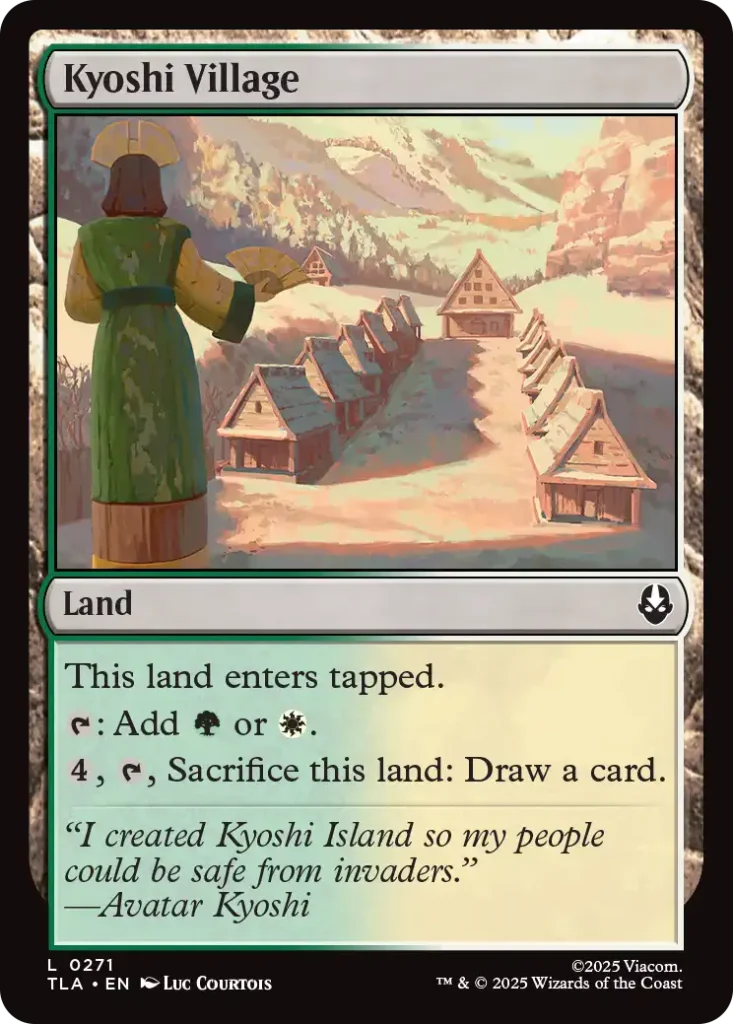
Mana bases in limited are often pretty bad, so you want to improve them whenever possible. In Avatar draft, the easiest way to do so is with the cycle of 10 common dual lands. They enter tapped and provide two colors of mana. Late in the game, you can exchange them for a new card, which is a nice way to combat mana flood.
You want to pick the ones in your colors (and the ones that enable splashing) somewhere above C-level cards (these are playable, but not particularly exciting).
Furthermore, don’t underestimate the 5 rare mono-colored utility lands. If you’re playing their colors, they are basically without a downside. They basically always enter untapped, as all you need to do is control at least a single basic land.
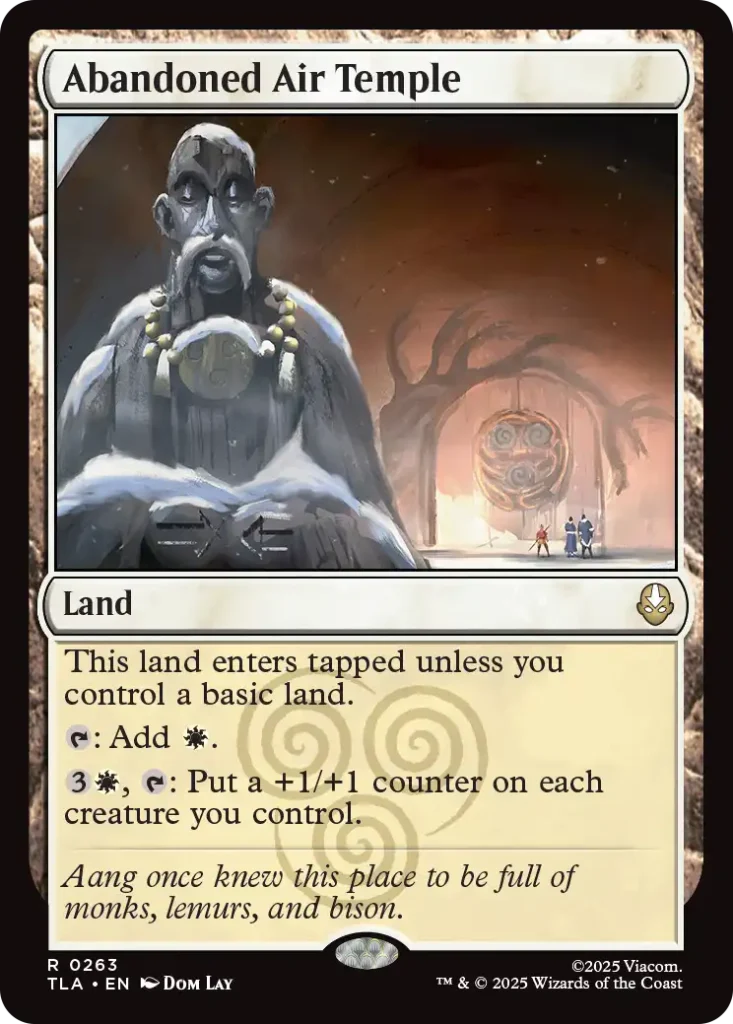
All of them are at least playable. Fire Nation Palace is perhaps the least exciting, but the white one, Abandoned Air Temple is a borderline bomb — a land that offers you a repeatable way to pump your team can be a winning game plan.
How Many Lands to Play in Avatar Draft?
For the most part, going with the standard 17 lands, will work well in Avatar draft.
Some formats include one mana cantrips, or land-searchers, which can encourage you to cut down on lands, but these aren’t really present here. (The closest would be Seismic Sense, but that card actually improves with more lands in play.) Thus, you shouldn’t really go below 17 lands.
However, you could go up to 18 lands, particularly if you’re playing a utility land that makes colorless mana, such as Secret Tunnel or Jasmine Dragon Tea Shop. These can be useful in a right scenario, but you still want to hit your colored mana sources — so playing 18 lands is a nice compromise.
Best Colors & Archetypes in Avatar Draft
Now it’s time to rank the colors and archetypes of Avatar draft. There are two important things to keep in mind with these power rankings.
First, these are early predictions. Without playing the format for at least a week, it’s impossible to be certain about them. Our best option are educated guesses, based on past experiences with similar cards. So, rankings could (and probably will) somewhat change in the upcoming weeks.
Second, nothing is unplayable, even if a color or archetype is last, you can still play and win with it. It’s just might be a bit harder to consistently draft a good deck around it.
So, the best use of these is to treat them as tiebreakers when deciding between cards of similar power level.
Colors
- White
- Green
- Black
- Blue
- Red
It looks like the colors could be divided into two groups. White, green, and black all feature a lot of strong cards across all rarities.
Blue and red seem a bit weaker. Blue still has many useful tools, just a bit less than the aforementioned colors. It can still be a really solid support color or even the main one occasionally.
The ranking of red is low because firebending seems somewhat weak. Most creatures with this ability use slightly below-rate stats and are without enters effects. Usually, such cards don’t perform that well in most recent draft sets.
Still, the mechanic could play out better than it looks, and red still has plenty of useful cards, so it’s not unplayable by any means.
Archetypes
- Green-White: Go-Wide Allies
- Black-Green: +1/+1 Counters & Earthbend
- Black-White: Sacrifice
- Red-White: Go-Wide Aggro
- Blue-White: Flyers Tempo
- Blue-Black: Draw Two Control
- Red-Green: Midrange
- Blue-Green: Ramp & Lessons
- Blue-Red: Lessons & Noncreature Spells
- Black-Red: Firebending Aggro
The first three archetypes consist of what we consider the best colors. After that, all archetypes seem fine, albeit a tad bit weaker perhaps.
But again, keep in mind the caveats mentioned above — these are early predictions that could change as we play more Avatar drafts.
Avatar Draft Tier List
So, that’s the big picture stuff about this format. The article already got quite long, even though we didn’t discuss all cards. If you need help evaluating them and knowing which are the actual good cards, check out our Avatar Draft Tier List.
In that article you’ll find grades for every single card you can open in Avatar Play boosters. This way, you’ll know which are the cards you should pay attention to.
Conclusion
With that, we wrapping our Avatar Draft Guide. You can expect a first major update to the article a few days after the set releases on Arena. Make sure to check back then and discover even more about details about how to draft this set.
Do you still have some questions about this draft format? Leave a comment below, and we’ll get back to you.
If you plan to organize a draft for your play group, you’ll need a Play booster box. You can already get it on Amazon, and lock-in that preorder price.

Until next time — enjoy Magic, and happy drafting. Yip, yip!
Awesome guide!!! Thank you
Thanks. Wish you all the best in your drafts!
excelente sempre!